
目录
Pygame实战(一):随机抽位置
一、 概述
1、 简介
在学完Pygame基础后,大家是不是非常想做一些小程序出来玩呢?
最近,别人问我,可不可以做一个随机选人的程序,即根据随机选出一个位置来,以做到选人的功能!这让我想起了以前做的一个贪吃蛇的小游戏(后面有时间再出教程),其中食物的出现就是随机的,这让我答应了那个同学的要求!那我们就开始来写吧!
2、 设计思路
首先,我们需要有一个设计的思路:
-
设置配置文件,通过配置文件来设置参数
由于使用者不是程序员,那么,我们就肯定要使用友好的方式来让程序可以尽量按照使用者的想法来运行
这里,我们选择的配置文件是
yaml文件 -
界面设计
把界面分成两块,即显示区和操作区
这里使用
other_width这个参数来控制操作区的大小- 显示区绘制网格
- 操作区显示文字
-
随机方块
-
程序打包
由于这个设计思路是第一次写,可能写的不是很好!
3、 成果展示

二、 开始编程
1、 配置文件
创建一个config.yml,然后写入:
width_num: 10 # 有多少个横排
height_num: 8 # 有多少个竖排
width: 800  # 宽度
height: 600  # 高度
other_w: 250  # 操作界面的宽度
other_h: 600  # 操作界面的高度
timer: 400  # 一次抽取的时间,单位为ms
fps: 40  # 设置界面的帧数
background: background=(41, 45, 62)  # 设置背景颜色
font: "config/STSONG.TTF"  # 设置字体
margin: 4  # 设置边框与文字的边距
store: "config/data.json"  # 设置数据存储路径,防止程序的重启,造成程序数据的丢失
同时,将我们的字体文件一起移入config文件夹中
2、 程序界面
由于这个是一个文档,不是很好展示。
2.1 读取配置
import sys
import pygame
import yaml
from pathlib import Path
from random import randint
import json

background: tuple = None  # 背景颜色变量

with open("config/config.yml", "r", encoding="utf-8") as f:  # 读取配置文件
    config_data = yaml.load(f, Loader=yaml.FullLoader)  # 加载配置
    exec(config_data["background"])  # 使用反射机制读取背景颜色
2.2 工具类
这个工具类是后面需要使用的,写在外面增加代码的可读性
class Tools:
	"""工具类"""

    @staticmethod
    def is_inrect(point, rect_tup):
        """判断是否在矩形内部"""
        point_x, point_y = point
        rect_tup_x, rect_tup_y, rect_tup_w, rect_tup_h = rect_tup
        if point_x > rect_tup_x and point_x < rect_tup_x + rect_tup_w:  # 如果横坐标在里面
            if point_y > rect_tup_y and point_y < rect_tup_y + rect_tup_h:  # 并且纵坐标在里面
                return True  # 返回真
        return False  # 返回假

    @staticmethod
    def save(data):
        """保存数据文件"""
        p: Path = config_data["store"]
        with open(p, "w", encoding="utf-8") as f:
            json.dump(data, f)

    @staticmethod
    def load():
        """读取数据文件"""
        p: Path = Path(config_data["store"])

        if p.exists():
            "如果文件存在"
            with open(p, "r", encoding="utf-8") as f:
                data = json.load(f)
                return data
        else:
            return {"selected": []}
2.3 显示区
class MainWindow:
    def __init__(self) -> None:
        self.selected = [(i[0], i[1]) for i in Tools.load()["selected"]]  # 设置已经抽到过的点
        self.is_start = False  # 标记是否开始选人
        self.pos = ()  # 存放当前坐标的元组
        self.init()  # 初始化配置
        self.init_data()  # 初始化数据
        # 创建一个定时器事件
        self.RANDOM_POS = pygame.USEREVENT + 1
        self.draw_line(False)  # 画线


    def init(self) -> None:
        pygame.init()  # 初始化程序
        w, h = config_data["width"] + config_data["other_w"], config_data["height"]  # 设置界面的高度和宽度
        self.screen = pygame.display.set_mode(size=(w, h))  # 设置屏幕的大小
        pygame.display.set_caption("随机选人")  # 设置标题
        self.clock = pygame.time.Clock()  # 设置一个时钟

    def init_data(self) -> None:
        self.w_t, self.h_t = config_data["width"] // 200, config_data["height"] // 200  # 距离底端和侧边的距离
        self.total_w = config_data["width"] - 2 * self.w_t  # 求出显示随机图片区域的宽度
        self.total_h = config_data["height"] - 2 * self.h_t  # 设置显示区域的高度
        self.count_w, self.count_h = config_data["width_num"], config_data["height_num"]  # 获取多少行,多少列
        self.space_w, self.space_h = self.total_w // self.count_w, self.total_h // self.count_h  # 求出每一个矩形的宽度和高度


    def draw_line(self, is_flush=True) -> None:
        """is_flush参数,指定需不需要刷新随机坐标,因为在一开始显示界面以及在清空缓存时,其是不需要刷新坐标的"""
        self.screen.fill(background)  # 同时起到刷新界面的作用
        self.setButton(is_flush)  # 这里是创建操作区的函数,在后面来编写,先用来占位
        line_width = 1  # 设置边框的线宽
        for i in range(self.count_w + 1):
            # 画竖线
            pos_start = (i *  self.space_w + self.w_t, self.h_t + line_width * 2)
            pos_end = (i *  self.space_w + self.w_t, self.total_h - self.h_t + 3 + line_width * 2)
            pygame.draw.line(self.screen, "white", pos_start, pos_end, line_width)
        for i in range(self.count_h + 1):
            # 画横线
            pos_start = (self.w_t + line_width * 2, i * self.space_h + self.h_t)
            pos_end = (self.total_w - self.w_t + 3 + line_width * 2, i * self.space_h + self.h_t)
            pygame.draw.line(self.screen, "white", pos_start, pos_end)
注意,这个显示区域,可以根据自己的思路来写,同时各个直线等的坐标,都是根据数学推出来的,可以自己去思考一下!
2.4 操作区
我们还需要有一个编写操作区的,进行开启随机抽人,以及结束随机抽人,同时还要有一个操作可以把以前抽到的人重新清空标记的操作,里面也都主要是数学的界面设计。
	def setButton(self, is_flush) -> None:
        """制作开始按钮,以及暂停按钮,同时还要显示一个选出来的位置"""
        margin, w, h = config_data["margin"], config_data["width"], config_data["height"]
        if self.is_start:  # 如果已经开始的话
            text = "停止选人"
        else:
            text = "开始选人"
        font = pygame.font.Font(config_data["font"], 25)  # 设置字体
        text: pygame.Surface = font.render(text, True, "white")  # 设置显示文本
        rect: pygame.Rect = text.get_rect()  # 获取文本矩形
        rect.center = (w + 0.5 * config_data["other_w"], 0.5 * h - 100)  # 设置文本矩形的位置
        self.new_rect = pygame.Rect(rect.left - margin, rect.top - margin, rect.width + 2 * margin, rect.height + 2 * margin)  # 绘制一个边框,作为一个按钮
        pygame.draw.rect(self.screen, "white", self.new_rect, 1, border_radius=4)
        self.screen.blit(text, rect)  # 将文本贴到屏幕中去

        clean = "清空缓存"
        font_ = pygame.font.Font(config_data["font"], 20)
        txt  = font_.render(clean, True, "white")
        rect_ = txt.get_rect()
        rect_.center = (w + config_data["other_w"] - 100, h - 50)
        self.new_rect_ = pygame.Rect(rect_.left - margin, rect_.top - margin, rect_.width + 2 * margin, rect_.height + 2 * margin)
        pygame.draw.rect(self.screen, "white", self.new_rect_, 1, border_radius=4)
        self.screen.blit(txt, rect_)

        x, y = self.getRet(is_flush)
        pos = font.render(f"第{x}列 | 第{y}排", True, "white")
        rect_pos = pos.get_rect()
        rect_pos.center = (w + 0.5 * config_data["other_w"], 0.5 * h + 100)
        new_rect_pos = pygame.Rect(rect_pos.left - margin, rect_pos.top - margin, rect_pos.width + 2 * margin, rect_pos.height + 2 * margin)
        pygame.draw.rect(self.screen, "white", new_rect_pos, 1, border_radius=4)
        self.screen.blit(pos, rect_pos)

    def getRet(self, is_flush=True) -> tuple:
        """获取到那个随机坐标的位置"""
        self.get_random_position()  # 获取随机矩形的坐标
        if self.pos and is_flush:  # 重置文本内容,如果在清空缓存时,或者初始化时,都不使用随机出来的数据
            w, h = self.pos
            pos = (w + 1, h + 1)
        else:
            pos = (0, 0)

        return pos
2.5 随机矩形
    def get_random_position(self) -> None:
        """获取一个随机坐标渲染出矩形来"""
        pos = (randint(0, self.count_w - 1), randint(0, self.count_h - 1))  # 生成一个坐标
        if pos in self.selected:  # 如果选择的位置在已经选择过
                return self.get_random_position()  # 如果在返回函数,继续调用

        self.pos = pos


    def set_random_rect(self) -> None:
        """渲染矩形"""
        x, y = self.pos
        rect = pygame.Rect(x *  self.space_w + self.w_t + 3, y * self.space_h + self.h_t + 3,  self.space_w - 6, self.space_h - 6)  # 创建一个矩形
        pygame.draw.rect(self.screen, (randint(125, 255), randint(129, 255), randint(100, 255)), rect)  # 把矩形渲染出来
这个随机矩形的位置也是通过数学计算出来的
3、 事件处理
    def toggle_status(self) -> None:
        """切换是否选人的状态"""
        if self.is_start:
            self.is_start = False  # 将程序状态设为关闭
            pygame.time.set_timer(self.RANDOM_POS, 0)  # 关闭定时器
            self.selected.append(self.pos)  # 将已经选过的点添加到列表中
            self.draw_line()  # 绘制界面
            self.set_random_rect()  # 获取随机矩形
            Tools.save({"selected": self.selected})  # 将数据保存到文件中,进行持久化存储
        else:
            self.is_start = True  # 将程序状态设置为开启
            pygame.time.set_timer(self.RANDOM_POS, config_data["timer"])  # 设置定时器
            self.draw_line()  # 绘制界面
            self.set_random_rect()  # 获取随机矩形


    def handleEvent(self, event: pygame.event.Event) -> None:
        """事件处理器"""
        if event.type == pygame.QUIT:  # 程序关闭界面
            pygame.quit()
            sys.exit(0)
        elif event.type == self.RANDOM_POS:  # 定时事件,获取随机矩形
            if self.is_start:  # 如果程序处于启动状态时,进入
                self.draw_line()
                self.set_random_rect()
        elif event.type == pygame.MOUSEBUTTONUP:  # 鼠标事件,即监控按钮点击事件
            if event.button == 1:
                """说明其为左键"""
                if Tools.is_inrect(event.pos, self.new_rect):
                    """更新状态"""
                    self.toggle_status()
                elif Tools.is_inrect(event.pos, self.new_rect_):
                    """清空已经选择的缓存"""
                    self.selected.clear()
                    self.is_start = False  # 将选择关闭,同时将定时器关闭
                    pygame.time.set_timer(self.RANDOM_POS, 0)
                    Tools.save({"selected": self.selected})
                    self.draw_line(False)
4、 总程序
import sys
import pygame
import yaml
from pathlib import Path
from random import randint
import json


background: tuple = None  # 背景颜色变量

with open("config/config.yml", "r", encoding="utf-8") as f:  # 读取配置文件
    config_data = yaml.load(f, Loader=yaml.FullLoader)  # 加载配置
    exec(config_data["background"])  # 使用反射机制读取背景颜色

class Tools:
	"""工具类"""

    @staticmethod
    def is_inrect(point, rect_tup):
        """判断是否在矩形内部"""
        point_x, point_y = point
        rect_tup_x, rect_tup_y, rect_tup_w, rect_tup_h = rect_tup
        if point_x > rect_tup_x and point_x < rect_tup_x + rect_tup_w:  # 如果横坐标在里面
            if point_y > rect_tup_y and point_y < rect_tup_y + rect_tup_h:  # 并且纵坐标在里面
                return True  # 返回真
        return False  # 返回假

    @staticmethod
    def save(data):
        """保存数据文件"""
        p: Path = config_data["store"]
        with open(p, "w", encoding="utf-8") as f:
            json.dump(data, f)

    @staticmethod
    def load():
        """读取数据文件"""
        p: Path = Path(config_data["store"])

        if p.exists():
            "如果文件存在"
            with open(p, "r", encoding="utf-8") as f:
                data = json.load(f)
                return data
        else:
            return {"selected": []}


class MainWindow:
    def __init__(self) -> None:
        self.selected = [(i[0], i[1]) for i in Tools.load()["selected"]]  # 设置已经抽到过的点
        self.is_start = False  # 标记是否开始选人
        self.pos = ()  # 存放当前坐标的元组
        self.init()  # 初始化配置
        self.init_data()  # 初始化数据
        # 创建一个定时器事件
        self.RANDOM_POS = pygame.USEREVENT + 1
        self.draw_line(False)  # 画线


    def init(self) -> None:
        pygame.init()  # 初始化程序
        w, h = config_data["width"] + config_data["other_w"], config_data["height"]  # 设置界面的高度和宽度
        self.screen = pygame.display.set_mode(size=(w, h))  # 设置屏幕的大小
        pygame.display.set_caption("随机选人")  # 设置标题
        self.clock = pygame.time.Clock()  # 设置一个时钟

    def init_data(self) -> None:
        self.w_t, self.h_t = config_data["width"] // 200, config_data["height"] // 200  # 距离底端和侧边的距离
        self.total_w = config_data["width"] - 2 * self.w_t  # 求出显示随机图片区域的宽度
        self.total_h = config_data["height"] - 2 * self.h_t  # 设置显示区域的高度
        self.count_w, self.count_h = config_data["width_num"], config_data["height_num"]  # 获取多少行,多少列
        self.space_w, self.space_h = self.total_w // self.count_w, self.total_h // self.count_h  # 求出每一个矩形的宽度和高度


    def draw_line(self, is_flush=True) -> None:
        """is_flush参数,指定需不需要刷新随机坐标,因为在一开始显示界面以及在清空缓存时,其是不需要刷新坐标的"""
        self.screen.fill(background)  # 同时起到刷新界面的作用
        self.setButton(is_flush)  # 这里是创建操作区的函数,在后面来编写,先用来占位
        line_width = 1  # 设置边框的线宽
        for i in range(self.count_w + 1):
            # 画竖线
            pos_start = (i *  self.space_w + self.w_t, self.h_t + line_width * 2)
            pos_end = (i *  self.space_w + self.w_t, self.total_h - self.h_t + 3 + line_width * 2)
            pygame.draw.line(self.screen, "white", pos_start, pos_end, line_width)
        for i in range(self.count_h + 1):
            # 画横线
            pos_start = (self.w_t + line_width * 2, i * self.space_h + self.h_t)
            pos_end = (self.total_w - self.w_t + 3 + line_width * 2, i * self.space_h + self.h_t)
            pygame.draw.line(self.screen, "white", pos_start, pos_end)

    def get_random_position(self) -> None:
        """获取一个随机坐标渲染出矩形来"""
        pos = (randint(0, self.count_w - 1), randint(0, self.count_h - 1))  # 生成一个坐标
        if pos in self.selected:  # 如果选择的位置在已经选择过
                return self.get_random_position()  # 如果在返回函数,继续调用

        self.pos = pos


    def set_random_rect(self) -> None:
        """渲染矩形"""
        x, y = self.pos
        rect = pygame.Rect(x *  self.space_w + self.w_t + 3, y * self.space_h + self.h_t + 3,  self.space_w - 6, self.space_h - 6)  # 创建一个矩形
        pygame.draw.rect(self.screen, (randint(125, 255), randint(129, 255), randint(100, 255)), rect)  # 把矩形渲染出来

    def setButton(self, is_flush) -> None:
        """制作开始按钮,以及暂停按钮,同时还要显示一个选出来的位置"""
        margin, w, h = config_data["margin"], config_data["width"], config_data["height"]
        if self.is_start:  # 如果已经开始的话
            text = "停止选人"
        else:
            text = "开始选人"
        font = pygame.font.Font(config_data["font"], 25)  # 设置字体
        text: pygame.Surface = font.render(text, True, "white")  # 设置显示文本
        rect: pygame.Rect = text.get_rect()  # 获取文本矩形
        rect.center = (w + 0.5 * config_data["other_w"], 0.5 * h - 100)  # 设置文本矩形的位置
        self.new_rect = pygame.Rect(rect.left - margin, rect.top - margin, rect.width + 2 * margin, rect.height + 2 * margin)  # 绘制一个边框,作为一个按钮
        pygame.draw.rect(self.screen, "white", self.new_rect, 1, border_radius=4)
        self.screen.blit(text, rect)  # 将文本贴到屏幕中去

        clean = "清空缓存"
        font_ = pygame.font.Font(config_data["font"], 20)
        txt  = font_.render(clean, True, "white")
        rect_ = txt.get_rect()
        rect_.center = (w + config_data["other_w"] - 100, h - 50)
        self.new_rect_ = pygame.Rect(rect_.left - margin, rect_.top - margin, rect_.width + 2 * margin, rect_.height + 2 * margin)
        pygame.draw.rect(self.screen, "white", self.new_rect_, 1, border_radius=4)
        self.screen.blit(txt, rect_)

        x, y = self.getRet(is_flush)
        pos = font.render(f"第{x}列 | 第{y}排", True, "white")
        rect_pos = pos.get_rect()
        rect_pos.center = (w + 0.5 * config_data["other_w"], 0.5 * h + 100)
        new_rect_pos = pygame.Rect(rect_pos.left - margin, rect_pos.top - margin, rect_pos.width + 2 * margin, rect_pos.height + 2 * margin)
        pygame.draw.rect(self.screen, "white", new_rect_pos, 1, border_radius=4)
        self.screen.blit(pos, rect_pos)


    def getRet(self, is_flush=True) -> tuple:
        """获取到那个随机坐标的位置"""
        self.get_random_position()  # 获取随机矩形的坐标
        if self.pos and is_flush:  # 重置文本内容,如果在清空缓存时,或者初始化时,都不使用随机出来的数据
            w, h = self.pos
            pos = (w + 1, h + 1)
        else:
            pos = (0, 0)

        return pos


    def toggle_status(self) -> None:
        """切换是否选人的状态"""
        if self.is_start:
            self.is_start = False  # 将程序状态设为关闭
            pygame.time.set_timer(self.RANDOM_POS, 0)  # 关闭定时器
            self.selected.append(self.pos)  # 将已经选过的点添加到列表中
            self.draw_line()  # 绘制界面
            self.set_random_rect()  # 获取随机矩形
            Tools.save({"selected": self.selected})  # 将数据保存到文件中,进行持久化存储
        else:
            self.is_start = True  # 将程序状态设置为开启
            pygame.time.set_timer(self.RANDOM_POS, config_data["timer"])  # 设置定时器
            self.draw_line()  # 绘制界面
            self.set_random_rect()  # 获取随机矩形


    def handleEvent(self, event: pygame.event.Event) -> None:
        """事件处理器"""
        if event.type == pygame.QUIT:  # 程序关闭界面
            pygame.quit()
            sys.exit(0)
        elif event.type == self.RANDOM_POS:  # 定时事件,获取随机矩形
            if self.is_start:  # 如果程序处于启动状态时,进入
                self.draw_line()
                self.set_random_rect()
        elif event.type == pygame.MOUSEBUTTONUP:  # 鼠标事件,即监控按钮点击事件
            if event.button == 1:
                """说明其为左键"""
                if Tools.is_inrect(event.pos, self.new_rect):
                    """更新状态"""
                    self.toggle_status()
                elif Tools.is_inrect(event.pos, self.new_rect_):
                    """清空已经选择的缓存"""
                    self.selected.clear()
                    self.is_start = False  # 将选择关闭,同时将定时器关闭
                    pygame.time.set_timer(self.RANDOM_POS, 0)
                    Tools.save({"selected": self.selected})
                    self.draw_line(False)


    def main(self) -> None:
        """事件循环"""
        while True:
            self.clock.tick(config_data["fps"])  # 设置游戏帧数
            for event in pygame.event.get():  # 添加事件监听
                self.handleEvent(event)
            pygame.display.update()  # 更新界面

if __name__ == "__main__":
    win = MainWindow()
    win.main()
三、 程序打包
程序我们设计完了,然后我们就使用pyinstaller来给我们的程序打包,打包成exe文件:
1、 规范文件
首先,生成spec文件:
pyi-makespec main.py -F -w
编写main.spec文件:
# -*- mode: python ; coding: utf-8 -*-


block_cipher = None


a = Analysis(
    ['main.py'],
    pathex=["D:\\35005\\桌面\\MyCoon"],
    binaries=[],
    datas=[("config/*.*", "config")],
    hiddenimports=[],
    hookspath=[],
    hooksconfig={},
    runtime_hooks=[],
    excludes=[],
    win_no_prefer_redirects=False,
    win_private_assemblies=False,
    cipher=block_cipher,
    noarchive=False,
)
pyz = PYZ(a.pure, a.zipped_data, cipher=block_cipher)

exe = EXE(
    pyz,
    a.scripts,
    a.binaries,
    a.zipfiles,
    a.datas,
    [],
    name='main',
    debug=False,
    bootloader_ignore_signals=False,
    strip=False,
    upx=True,
    upx_exclude=[],
    runtime_tmpdir=None,
    console=False,
    disable_windowed_traceback=False,
    argv_emulation=False,
    target_arch=None,
    codesign_identity=None,
    entitlements_file=None,
)
2、 打包运行
规范文件编写完成后,我们就可以把我们的程序进行打包了:
pyinstaller main.spec # 进行打包
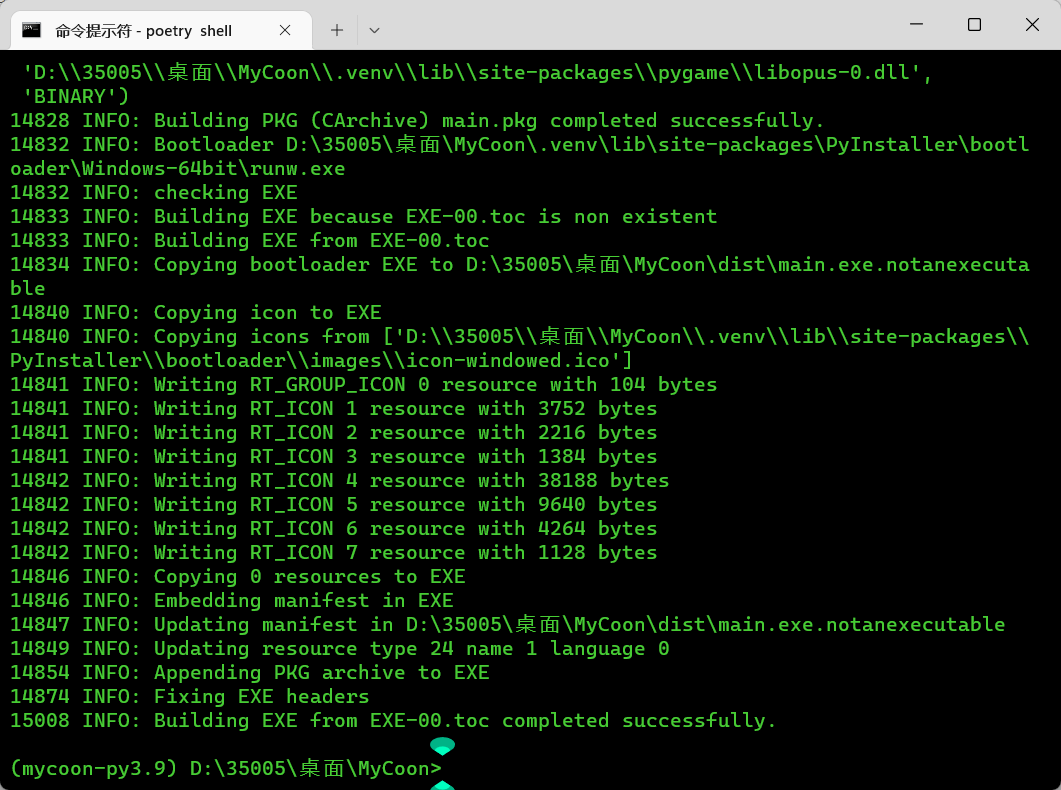
打包成功:
最后,只要将配置文件的目录放入dist文件夹中就可以了
原文地址:http://www.cnblogs.com/liuzhongkun/p/16814419.html
1. 本站所有资源来源于用户上传和网络,如有侵权请邮件联系站长!
2. 分享目的仅供大家学习和交流,请务用于商业用途!
3. 如果你也有好源码或者教程,可以到用户中心发布,分享有积分奖励和额外收入!
4. 本站提供的源码、模板、插件等等其他资源,都不包含技术服务请大家谅解!
5. 如有链接无法下载、失效或广告,请联系管理员处理!
6. 本站资源售价只是赞助,收取费用仅维持本站的日常运营所需!
7. 如遇到加密压缩包,默认解压密码为"gltf",如遇到无法解压的请联系管理员!
8. 因为资源和程序源码均为可复制品,所以不支持任何理由的退款兑现,请斟酌后支付下载
声明:如果标题没有注明"已测试"或者"测试可用"等字样的资源源码均未经过站长测试.特别注意没有标注的源码不保证任何可用性