
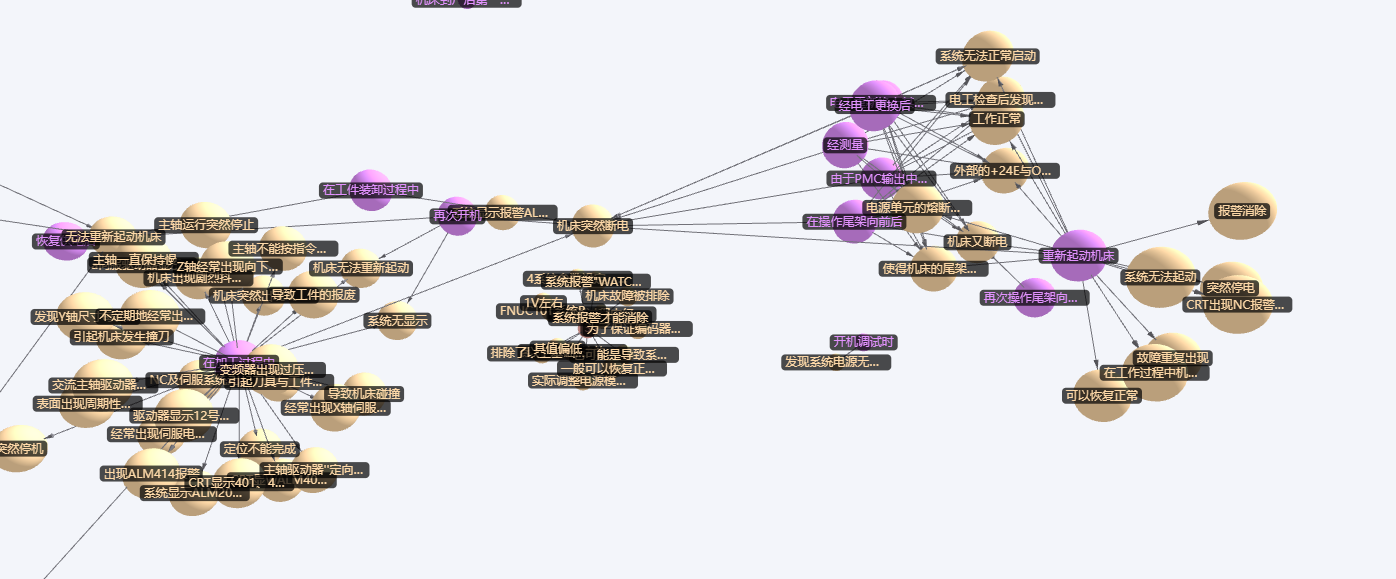
效果图
文档
可以先去官网看看文档或者看看我下面的参考博客,把基本配置看懂。
github.com/vasturiano/3d-force-graph
3d-force-graph:文档翻译
配置
// 初始化 3d
function threeInit() {
  const relationData = _.cloneDeep(props.echartsData);
  const data = {
    links: relationData.edges,
    nodes: relationData.nodes,
  };
  const elm: any = document.getElementById("3d-graph");
  const width = elm.offsetWidth;
  const height = elm.offsetHeight;
  let CSS2DRendererItem: any = new CSS2DRenderer();
  Graph = ForceGraph3D({
    extraRenderers: [CSS2DRendererItem],
  })(elm).graphData(data);
  Graph.numDimensions(3) // 维度 3 就是 3d
    .width(width)
    .height(height)
    .backgroundColor("#f3f5fa")
    .showNavInfo(false)
    /* 节点配置 */
    .nodeRelSize(8)
    .nodeColor((node: any) => colorMap[node.label])
    .nodeOpacity(1)
    .nodeResolution(30) // 节点分辨率
    .nodeLabel((node: any) => `<div class='node-label2'>${node.name}</div>`)
    .nodeThreeObjectExtend(true)
    .nodeThreeObject((node: any) => {
      const nodeEl = document.createElement("div");
      nodeEl.textContent = node.name;
      nodeEl.className = "node-label";
      nodeEl.style.color = colorMap[node.label];
      return new CSS2DObject(nodeEl);
    })
    .onNodeHover((node: any) => {
      elm.style.cursor = node ? "pointer" : null;
    })
    .onNodeClick((node: any) => {
      // 首页点击节点聚焦
      if (store.routerName === "home" && node.name !== focusNodeName) {
        focusNodeName = node.name;
        focusNode(node);
      }
      // 故障推理点击节点
      if (store.routerName === "fault") {
        tempNode = node;
        emit("nodesClcik", node);
      }
    })
    /* 边配置 */
    .linkLabel((link: any) => {
      return `<div class='link-label'>${lineTextMap[link.type]}</div>`;
    })
    .onLinkHover((node: any) => {
      elm.style.cursor = node ? "pointer" : null;
    })
    .linkDirectionalArrowLength(3) // 边的指向箭头长度
    .linkDirectionalArrowRelPos(1) // 边的标签显示(鼠标滑到边上显示)
    .linkColor((link: any) => "#727279")
    .linkOpacity(1);

  cameraCenter();
}
// 聚焦 3d 节点
function focusNode(node: any) {
  const distance = 200;
  const distRatio = 1 + distance / Math.hypot(node.x, node.y, node.z);
  Graph.cameraPosition(
    {
      x: node.x * distRatio,
      y: node.y * distRatio,
      z: node.z * distRatio,
    }, // new position
    node, // lookAt ({ x, y, z })
    2000 // ms transition duration)
  );
}
// 3d 镜头拉近
function cameraCenter(x: any = -300, y: any = 30, z: any = 30) {
  Graph.cameraPosition({
    x: x,
    y: y,
    z: z,
  });
}
参考博客
3D知识图谱可视化
3d-force-graph示例学习记录
在Vue中使用3d-force-graph渲染neo4j图谱
原文地址:https://www.cnblogs.com/cqkjxxxx/p/16787469.html
1. 本站所有资源来源于用户上传和网络,如有侵权请邮件联系站长!
2. 分享目的仅供大家学习和交流,请务用于商业用途!
3. 如果你也有好源码或者教程,可以到用户中心发布,分享有积分奖励和额外收入!
4. 本站提供的源码、模板、插件等等其他资源,都不包含技术服务请大家谅解!
5. 如有链接无法下载、失效或广告,请联系管理员处理!
6. 本站资源售价只是赞助,收取费用仅维持本站的日常运营所需!
7. 如遇到加密压缩包,默认解压密码为"gltf",如遇到无法解压的请联系管理员!
8. 因为资源和程序源码均为可复制品,所以不支持任何理由的退款兑现,请斟酌后支付下载
声明:如果标题没有注明"已测试"或者"测试可用"等字样的资源源码均未经过站长测试.特别注意没有标注的源码不保证任何可用性