
本文由 简悦 SimpRead 转码, 原文地址 blog.csdn.net
之前尝试过使用vtk.js在浏览器上绘制三维图形。其与VTK C++版接口类似,上手较快,但vtk.js相对更新较慢,接口功能不完善。three.js相对更为主流,文档较为丰富,也有许多示例程序。blender是siggraph力推的一款开源、免费3D建模软件,借助社区内丰富的插件可以方便地实现许多功能。1、读取静态模型1.1 使用fbx格式导出blender模型将导出到.blender文件的同级…
之前尝试过使用 vtk.js 在浏览器上绘制三维图形。其与 VTK C++ 版接口类似,上手较快,但 vtk.js 相对更新较慢,接口功能不完善。three.js 相对更为主流,文档较为丰富,也有许多示例程序。
blender 是 siggraph 力推的一款开源、免费 3D 建模软件,借助社区内丰富的插件可以方便地实现许多功能。
1、读取静态模型
1.1 使用 fbx 格式导出 blender 模型
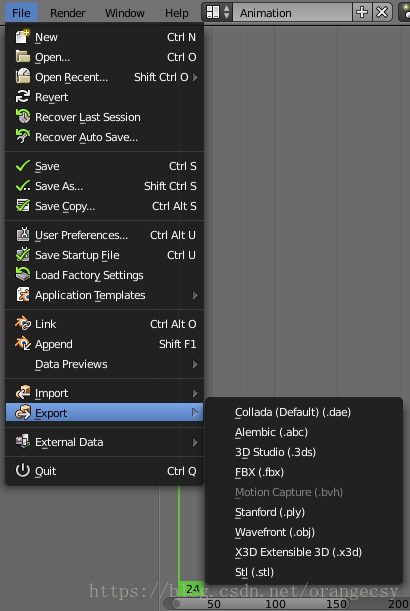
将导出到. blender 文件的同级目录。
除了上面的几种导出格式外,还可导出为 js 或 json 格式。为保持纯粹性,目前 three.js 的 github 项目中已删去支持 blender 导出 js 文件或 json 文件的 io 插件,可以 git 到较老的版本,或使用我保存的 io 工具。复制到 blender 的 addons 文件夹下相应位置即可导出相应格式的文件。
1.2 three.js 载入 fbx 文件

// 声明变量
let scene, camera, renderer, HEIGHT, WIDTH;
// 创建场景
function createScene() {
HEIGHT = window.innerHeight;
WIDTH = window.innerWidth;
const fieldOfView = 60;
const aspectRatio = WIDTH / HEIGHT;
const nearPlane = 1;
const farPlane = 10000;
// 相机
camera = new THREE.PerspectiveCamera(
fieldOfView,
aspectRatio,
nearPlane,
farPlane
);
camera.position.x = 0;
camera.position.y = 0;
camera.position.z = 1000;
// 场景
scene = new THREE.Scene();
// 渲染
renderer = new THREE.WebGLRenderer({alpha: true, antialias: true});
renderer.setSize(WIDTH, HEIGHT);
renderer.shadowMap.enabled = true;
// 加入DOM
const container = document.getElementById('main');
container.appendChild(renderer.domElement);
window.addEventListener('resize', handleWindowResize, false);
}
// 屏幕缩放
function handleWindowResize() {
HEIGHT = window.innerHeight;
WIDTH = window.innerWidth;
renderer.setSize(WIDTH, HEIGHT);
camera.aspect = WIDTH / HEIGHT;
camera.updateProjectionMatrix();
}
// 光照
function createLights() {
// 天空的反光颜色,地面的反光颜色,光的强度
const light = new THREE.HemisphereLight( 0xFFFFFF, 0xFFFFFF, 0.8 );
light.position.set(0, 200, 0);
scene.add(light);
}
// 创建物体,暴露接口
let obj;
function createObject() {
const loader = new THREE.FBXLoader();
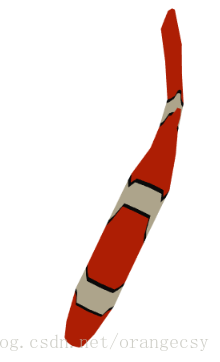
loader.load('ship.fbx', function (object) {
obj = object;
scene.add(object);
// 载入obj后动画循环
loop();
});
}
// 动画循环
function loop() {
obj.rotation.y += 0.01;
renderer.render(scene, camera);
requestAnimationFrame(loop);
}
function init() {
createScene();
createLights();
createObject();
}
window.addEventListener('load', init, false);
使用 THREE.FBXLoader 导入模型时,要配合 FBXLoader.js 和 inflate.min.js,index.html 内容如下。
<!DOCTYPE html>
<html>
<head>
  <meta charset="UTF-8">
  <title>Load</title>
</head>
<body>
  <div id="main"></div>
<script src="lib/three.min.js"></script>
<script src="lib/FBXLoader.js"></script>
<script src="lib/inflate.min.js"></script>
<script src="main.js"></script>
</body>
</html>
运行 http-server,打开 127.0.0.1:8080。
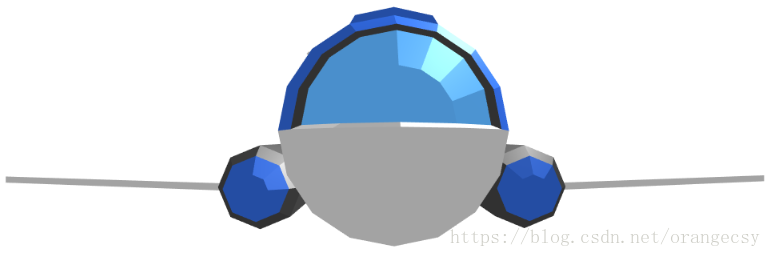
完整程序见我的 github,其中 blend 文件夹下为原始 blend 模型。
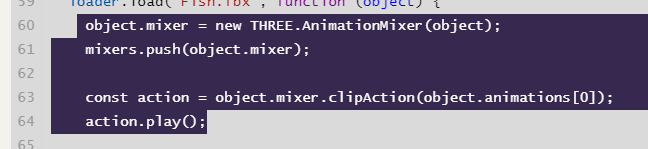
2、读取带动画的模型
在 blender 中可以给模型绑定动画,导出方法同 1.1。不同的是需将模型动画绑定到 THREE.AnimationMixer,并在每次动画循环时调用 update 方法更新。update 方法中传入两次 loop 函数的时间间隔。
// 声明变量
let scene, camera, renderer, HEIGHT, WIDTH;
// 创建场景
function createScene() {
HEIGHT = window.innerHeight;
WIDTH = window.innerWidth;
const fieldOfView = 60;
const aspectRatio = WIDTH / HEIGHT;
const nearPlane = 1;
const farPlane = 10000;
// 相机
camera = new THREE.PerspectiveCamera(
fieldOfView,
aspectRatio,
nearPlane,
farPlane
);
camera.position.x = 0;
camera.position.y = 0;
camera.position.z = 1000;
// 交互
const controls = new THREE.OrbitControls( camera );
controls.target.set(0, 100, 0);
controls.update();
// 场景
scene = new THREE.Scene();
// 渲染
renderer = new THREE.WebGLRenderer({alpha: true, antialias: true});
renderer.setSize(WIDTH, HEIGHT);
// 加入DOM
const container = document.getElementById('main');
container.appendChild(renderer.domElement);
window.addEventListener('resize', handleWindowResize, false);
}
// 屏幕缩放
function handleWindowResize() {
HEIGHT = window.innerHeight;
WIDTH = window.innerWidth;
renderer.setSize(WIDTH, HEIGHT);
camera.aspect = WIDTH / HEIGHT;
camera.updateProjectionMatrix();
}
// 光照
function createLights() {
// 天空的反光颜色,地面的反光颜色,光的强度
const light = new THREE.HemisphereLight(0xFFFFFF, 0xFFFFFF, 0.85);
// light.position.set(0, 200, 0);
scene.add(light);
}
var mixers = [];
var clock = new THREE.Clock();
function createObject() {
const loader = new THREE.FBXLoader();
loader.load('Fish.fbx', function (object) {
object.mixer = new THREE.AnimationMixer(object);
mixers.push(object.mixer);
const action = object.mixer.clipAction(object.animations[0]);
action.play();
// 侧面面对镜头
object.rotation.y = -1.57;
// 加入场景
scene.add(object);
// 载入obj后动画循环
loop();
});
}
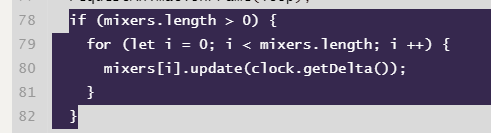
// 动画循环
function loop() {
requestAnimationFrame(loop);
if (mixers.length > 0) {
for (let i = 0; i < mixers.length; i ++) {
mixers[i].update(clock.getDelta());
}
}
renderer.render(scene, camera);
}
function init() {
createScene();
createLights();
createObject();
}
window.addEventListener('load', init, false);
three.js 只需引入 OrbitControls.j 文件,通过 THREE.OrbitControls(camera) 绑定 camera,即可用鼠标完成一些简单的交互,鼠标左键 – 旋转,鼠标滚轮 – 缩放,鼠标右键 – 拖动。
<!DOCTYPE html>
<html>
<head>
  <meta charset="UTF-8">
  <title>Load</title>
</head>
<body>
  <div id="main"></div>
<script src="lib/three.min.js"></script>
<script src="lib/FBXLoader.js"></script>
<script src="lib/inflate.min.js"></script>
<script src="lib/OrbitControls.js"></script>
<script src="main.js"></script>
</body>
</html>
完整程序见我的 github。
原文地址:http://www.cnblogs.com/zhuoss/p/16876845.html