
一、介绍
在 Vue 2.0 发布后,开发者使用 v-model 指令时必须使用名为 value 的 prop。如果开发者出于不同的目的需要使用其他的 prop,就不得不使用 v-bind.sync。
此外,由于 v-model 和 value 之间的这种硬编码关系的原因,产生了如何处理原生元素和自定义元素的问题。
在 Vue 2.2 中,Vue 引入了 model 组件选项,允许组件自定义用于 v-model 的 prop 和事件。但是,这仍然只允许在组件上使用一个 v-model。
在 Vue 3 中,双向数据绑定的 API 已经标准化,以减少开发者在使用 v-model 指令时的混淆,并且更加灵活。
2.x 中的语法
在 2.x 中,在组件上使用 v-model 相当于绑定 value prop 并触发 input 事件:
<template>
  <div>
    <div>父组件 -- {{count}}</div>
    <ChildComponent v-model="count" />

    <!-- 是以下的简写: -->
    <!-- <ChildComponent :value="count" @input="count = $event" /> -->
  </div>
</template>

<script>
import ChildComponent from '@/views/childComponent.vue';
export default {
  data() {
    return {
      count:100,
    };
  },
  components:{
    ChildComponent
  },
};
</script>
<template>
  <div>
    子组件
    <input type="text" v-model.number="inputVal" @input="userInput">
  </div>
</template>

<script>
export default {
  data() {
    return {
      inputVal:null,
    }
  },
  props:{
    value:{
      default:0,
    }
  },
  methods: {
    userInput(){
      this.$emit('input',this.inputVal)
    }
  },
  watch:{
    value:{
      handler(newVal,oldVal){
        this.inputVal = newVal;
      },
      immediate:true
    }
  }
}
</script>
这里 v-model 实际上就是为表单元素定制的,input 事件和 value prop 都是强耦合的。
如果想要更改 prop 或事件名称,则需要在 ChildComponent 组件中添加 model 选项:
<template>
  <div>
    <div>父组件 -- {{count}}</div>
    <ChildComponent v-model="count" />

    <!-- 是以下的简写: -->
    <!-- <ChildComponent :customParams="count" @change="count = $event" /> -->
  </div>
</template>
<template>
  <div>
    子组件
    <input type="text" v-model.number="inputVal" @input="userInput">
  </div>
</template>

<script>
export default {
  data() {
    return {
      inputVal:null,
    }
  },
  model: {
    prop: 'customParams',
    event: 'change'
  },
  props:{
    // 这将允许 `value` 属性用于其他用途
    value: String,
    // 使用 customParams 代替 value 作为 model 的 prop
    customParams: {
      default: 0,
    }
  },
  methods: {
    userInput(){
      console.log(this.inputVal)
      this.$emit('change',this.inputVal)
    }
  },
  watch:{
    customParams:{
      handler(newVal,oldVal){
        this.inputVal = newVal;
      },
      immediate:true
    }
  }
}
</script>
3.x 中的语法
在 3.x 中,自定义组件上的 v-model 相当于传递了 modelValue prop 并接收抛出的 update:modelValue 事件:
<template>
  <div>
    <div>父组件 -- {{count}}</div>
    <ChildComponent v-model="count"/>

    <!-- 是以下的简写: -->
    <!-- <ChildComponent :modelValue="count" @update:modelValue="count = $event"/> -->
  </div>
</template>

<script>
import { ref } from 'vue';
import ChildComponent from '@/components/childComponent.vue'
export default {
  components:{
    ChildComponent,
  },
  setup(){
    const count = ref(100);
    return {
      count,
    }
  }
}
</script>
<template>
  <div>
    子组件
    <input type="text" v-model.number="inputVal" @input="userInput">
  </div>
</template>

<script>
import { ref, watch } from 'vue';
export default {
  props:{
    modelValue:{
      default:0,
    }
  },
  setup(props,{emit}) {
    const inputVal = ref(null);
    const userInput = () => {
      emit('update:modelValue', inputVal.value)
    };

    watch(props,(newVal,oldVal) => {
      inputVal.value = props.modelValue;
    },{immediate:true})
    return {
      userInput,
      inputVal,
    }
  },
}
</script>
v-model 参数
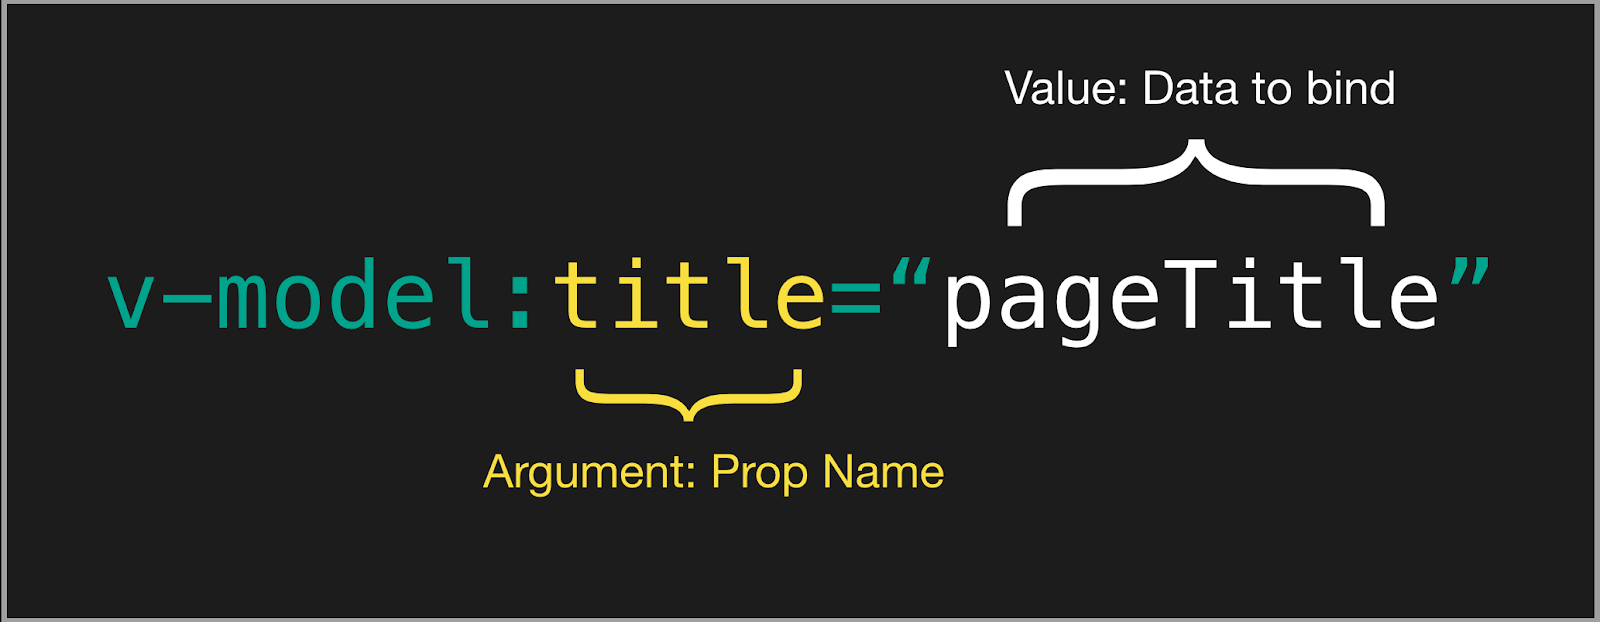
若需要更改 model 的名称,现在我们可以为 v-model 传递一个参数,以作为组件内 model 选项的替代:
<ChildComponent v-model:title="pageTitle" />

<!-- 是以下的简写: -->
<ChildComponent :title="pageTitle" @update:title="pageTitle = $event" />
允许我们在自定义组件上使用多个 v-model
<ChildComponent v-model:title="pageTitle" v-model:content="pageContent" />

<!-- 是以下的简写: -->

<ChildComponent
  :title="pageTitle"
  @update:title="pageTitle = $event"
  :content="pageContent"
  @update:content="pageContent = $event"/>
v-model 修饰符
除了像 .trim 这样的 2.x 硬编码的 v-model 修饰符外,现在 3.x 还支持自定义修饰符:
<ChildComponent v-model.capitalize="pageTitle" />
示例
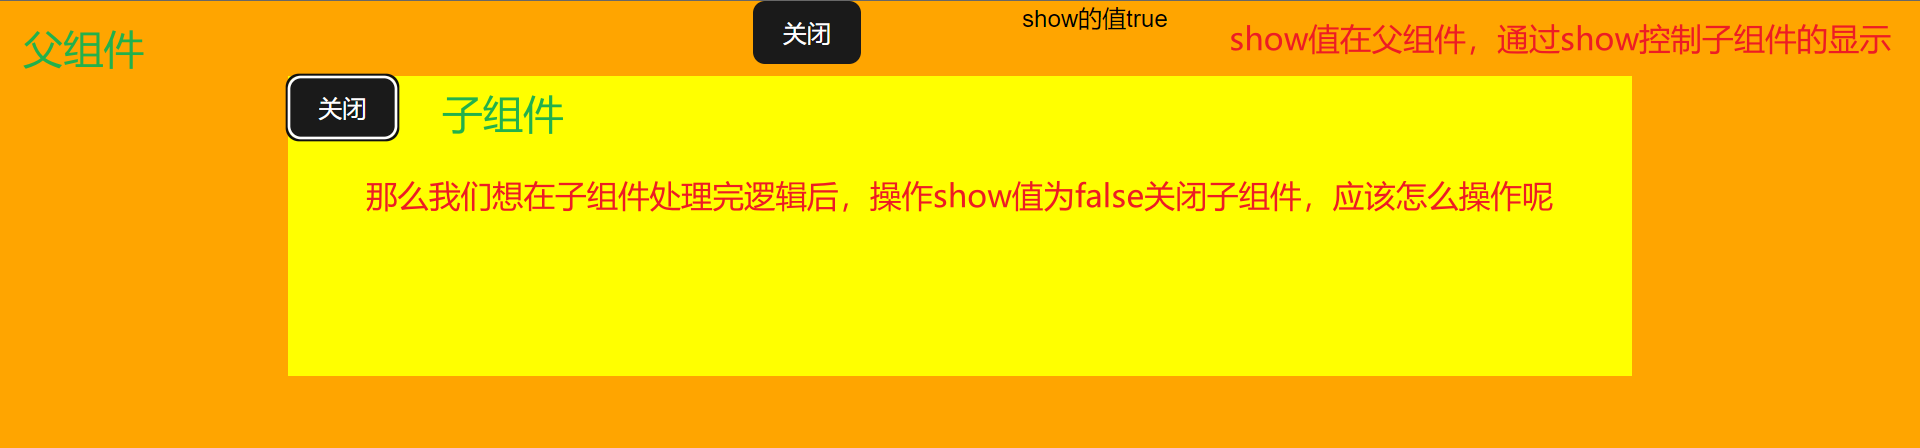
如果我们将:show=”show”通过父组件传到子组件,但很快发现子组件只能读show值,而不能更改

父组件
<template>
    <div class="parent">
        <Children v-if="show" :show="show" ></Children>
        <div class="float">
            <button @click="show = !show">{{ show ? "关闭" : "开启" }}</button>
            <div>show的值{{ show }}</div>
        </div>
    </div>
</template>

<script setup>
import { ref } from 'vue';
import Children from './Children.vue';
let show = ref(true);
</script>
子组件
<template>
    <div class="children">
        <button @click="close">
            关闭
        </button>
    </div>
</template>

<script setup>
let props = defineProps(['show'])

const close = () => {
    props.show= false;
}
</script>
当然,你可以在父组件传递给子组件一个自定义事件,通过子组件回调改变show值,那如果是多个值都需要修改呢,这样就显得繁琐了
而有了v-model,这一切都显得简单了
父组件
<Children v-if="show" v-model="show" ></Children>

子组件
<template>
    <div class="children">
        <button @click="close">
            关闭
        </button>
    </div>
</template>

<script setup>
let props = defineProps(['modelValue'])
let emits = defineEmits(['update:modelValue'])

const close = () => {
    console.log(props, emits)
    emits('update:modelValue', false);
}
</script>
我们只需要emits这个update:modelValue事件,就可以修改show值
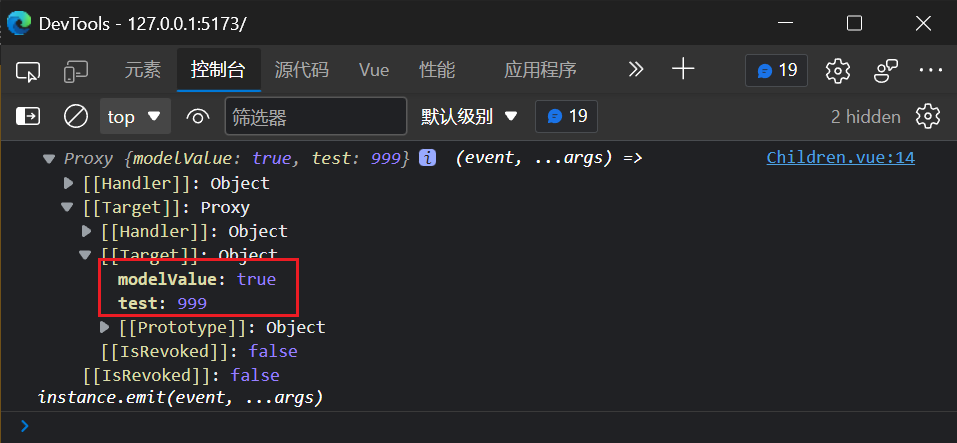
此外,默认情况下值名称是modelValue,我们可以自定义多个值
父组件
<Children v-if="show" v-model="show" v-model:test="test" ></Children>

子组件
<template>
    <div class="children">
        <button @click="close">
            关闭
        </button>
    </div>
</template>

<script setup>
let props = defineProps(['modelValue','test'])
let emits = defineEmits(['update:modelValue','update:test'])

const close = () => {
    console.log(props, emits)
    emits('update:modelValue', false);
}
</script>
其实这也是一个简单的父子组件传值和事件,只是v-model把它们进行了简单包装了
点击查看父子组件样式
/* 父组件 */
.parent {
    width: 100vw;
    height: 300px;
    display: flex;
    background-color: orange;
    justify-content: center;
    align-items: center;
}
.float{
    position: absolute;
    top: 0;
    display: flex;
    color: black;
    flex-direction: row;
    width: 30vw;
    justify-content: space-around;
    left: 50%;
    transform: translateX(-50%);
}

/* 子组件 */
.children {
    background-color: yellow;
    width: 70vw;
    height: 200px;
}
官方文档 v-model的使用
学习Vue3 第二十六章(深入v-model)
原文地址:http://www.cnblogs.com/echohye/p/16880149.html