
PyQt环境配置
PyQt5 及 pyqt5-tools 安装
直接pip安装即可:
pip install PyQt5
pip install pyqt5-tools
建议使用国内源,进行快速安装:
pip install -i https://pypi.tuna.tsinghua.edu.cn/simple pyqt5
pip install -i https://pypi.tuna.tsinghua.edu.cn/simple pyqt5-tools
PyCharm配置环境
启动PyCharm后,新建一个PyQt5空项目后,需要配置Qt Designer、pyuic、pyrcc工具,相关配置方法如下:
Qt Designer
Qt Designer 是通过拖拽的方式放置控件,并实时查看控件效果进行快速UI设计。
最终生成.ui文件(实质上是XML格式的文件),可以通过pyuic5工具转换成.py文件。
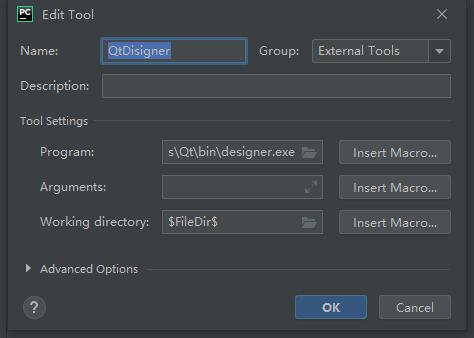
在Pycharm中,依次打开 File – Settings – Tools – External Tools,点击 + Create Tool,配置如下:
Name: QtDisigner
Program : C:\Python38\Lib\site-packages\pyqt5_tools\Qt\bin\designer.exe # 当前designer目录,请根据实际修改
Working directory: $FileDir$
PyUIC配置
PyUIC主要是把Qt Designer生成的.ui文件换成.py文件。
在Pycharm中,依次打开 File – Settings – Tools – External Tools,点击 + Create Tool,配置如下:
Name: PyUIC
Program : C:\Python38\python.exe # 当前Python目录,请根据实际修改
Arguments: -m PyQt5.uic.pyuic $FileName$ -o $FileNameWithoutExtension$.py
Working directory: $FileDir$

PyRCC配置
PyRCC主要是把编写的.qrc资源文件换成.py文件。
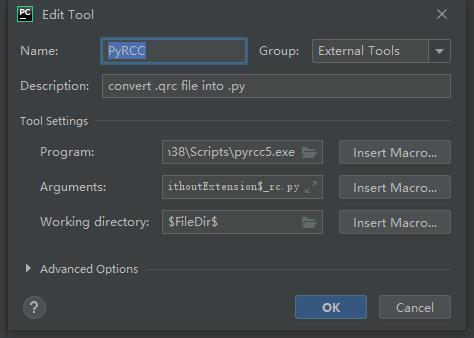
在Pycharm中,依次打开 File – Settings – Tools – External Tools,点击 + Create Tool,配置如下:
Name: PyRCC
Program : C:\Python38\Scripts\pyrcc5.exe # 当前rcc工具目录,请根据实际修改
Arguments: $FileName$ -o $FileNameWithoutExtension$_rc.py
Working directory: $FileDir$
实例开发
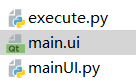
目录结构
设计界面UI
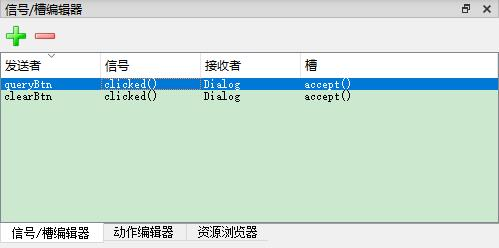
我们主要用到的控件有Button, GroupBox, Label,ComboBox,TextEdit,同时定义了两个按钮queryBtn及clearBtn,分别用来查询及清空天气数据。我们需要绑定槽函数,方法如下:
- 在Qt Designer右下角选择 信号/槽编辑器,点击+号新增
- 分别选择queryBtn及clearBtn,选择信号 clicked(), 接收者 Dialog 及槽 accept() (我没找到绑定自定义槽函数的方法…)
转换.ui文件为.py文件
在PyCharm中选中Weather.ui文件后,右键选择 External Tools – PyUIC,即可生成Weather.py,实际运行命令如下:
C:\Python38\python.exe -m PyQt5.uic.pyuic Weather.ui -o Weather.py
其中,我们需要把两个按钮绑定的槽函数:
self.queryBtn.clicked.connect(Dialog.accept)
self.clearBtn.clicked.connect(Dialog.accept)
修改为自定义函数:
self.queryBtn.clicked.connect(Dialog.queryWeather)
self.clearBtn.clicked.connect(Dialog.clearText)
完整代码
mainUI.py
# -*- coding: utf-8 -*-
# Form implementation generated from reading ui file 'main.ui'
#
# Created by: PyQt5 UI code generator 5.15.4
#
# WARNING: Any manual changes made to this file will be lost when pyuic5 is
# run again. Do not edit this file unless you know what you are doing.
from PyQt5 import QtCore, QtGui, QtWidgets
class Ui_MainWindow(object):
def setupUi(self, MainWindow):
MainWindow.setObjectName("MainWindow")
MainWindow.resize(800, 600)
self.centralwidget = QtWidgets.QWidget(MainWindow)
self.centralwidget.setObjectName("centralwidget")
self.getpictureButton = QtWidgets.QPushButton(self.centralwidget)
self.getpictureButton.setGeometry(QtCore.QRect(160, 420, 93, 28))
self.getpictureButton.setObjectName("getpictureButton")
self.putnetButton = QtWidgets.QPushButton(self.centralwidget)
self.putnetButton.setGeometry(QtCore.QRect(450, 420, 121, 28))
self.putnetButton.setObjectName("putnetButton")
self.picturelabel = QtWidgets.QLabel(self.centralwidget)
self.picturelabel.setGeometry(QtCore.QRect(120, 110, 191, 161))
self.picturelabel.setText("")
self.picturelabel.setObjectName("picturelabel")
MainWindow.setCentralWidget(self.centralwidget)
self.menubar = QtWidgets.QMenuBar(MainWindow)
self.menubar.setGeometry(QtCore.QRect(0, 0, 800, 26))
self.menubar.setObjectName("menubar")
MainWindow.setMenuBar(self.menubar)
self.statusbar = QtWidgets.QStatusBar(MainWindow)
self.statusbar.setObjectName("statusbar")
MainWindow.setStatusBar(self.statusbar)
self.retranslateUi(MainWindow)
self.getpictureButton.clicked.connect(MainWindow.getpicture)
self.putnetButton.clicked.connect(MainWindow.putnet)
QtCore.QMetaObject.connectSlotsByName(MainWindow)
def retranslateUi(self, MainWindow):
_translate = QtCore.QCoreApplication.translate
MainWindow.setWindowTitle(_translate("MainWindow", "MainWindow"))
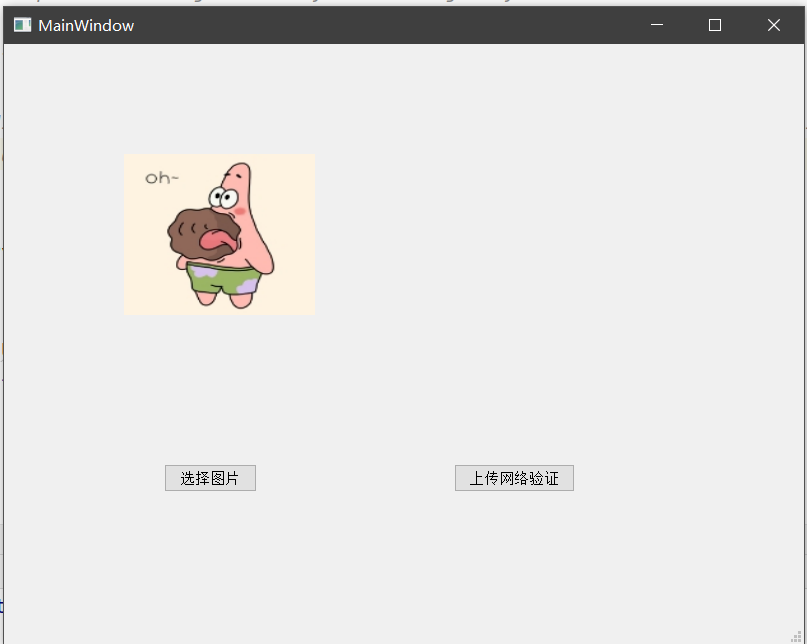
self.getpictureButton.setText(_translate("MainWindow", "选择图片"))
self.putnetButton.setText(_translate("MainWindow", "上传网络验证"))
execute.py
from Test03 import mainUI
import sys
from PyQt5.QtWidgets import QApplication, QDialog,QMainWindow,QFileDialog,QLabel
from PyQt5.QtGui import QPixmap
import requests
import base64


class Execute(QMainWindow):

    def __init__(self,parent=None):
        super(Execute, self).__init__(parent=parent)
        self.picture = ""
        self.ui = mainUI.Ui_MainWindow()
        self.ui.setupUi(self)


    def getpicture(self):
        # 从文件夹中选择图片
        print("进入方法")
        self.picture = QFileDialog.getOpenFileName(self, "选取文件", "./", "All Files (*);")
        pixmap = QPixmap(self.picture[0])  # 按指定路径找到图片
        self.ui.picturelabel.setPixmap(pixmap)  # 在label上显示图片
        self.ui.picturelabel.setScaledContents(True)  # 让图片自适应label大小


    def putnet(self):
        global token
        if(self.picture==""):
            print("还没有文件路径")
        else:
            print(self.picture[0])
            request_url = "https://aip.baidubce.com/rest/2.0/image-classify/v1/animal"
            # 二进制方式打开图片所属的[本地文件]
            f = open(self.picture[0], 'rb')
            img = base64.b64encode(f.read())

            # client_id 为官网获取的AK, client_secret 为官网获取的SK
            host = 'https://aip.baidubce.com/oauth/2.0/token?grant_type=client_credentials&client_id=EAfwVdTTmzwLTjH7IdEmQyTI&client_secret=36IvC9Ex7yEKW9ljZMyF314jSWreRw3L'
            response = requests.get(host)
            if response:
                token = response.json()['refresh_token']

            params = {"image": img}
            # 可将其替换为token
            access_token = '百度token'
            print(token)
            request_url = request_url + "?access_token=" + access_token
            headers = {'content-type': 'application/x-www-form-urlencoded'}
            response = requests.post(request_url, data=params, headers=headers)
            if response:
                print(response.json())


if __name__ == '__main__':
    myapp = QApplication(sys.argv)
    myDlg = Execute()
    myDlg.show()
    sys.exit(myapp.exec_())
原文地址:http://www.cnblogs.com/java-six/p/16888268.html