
实验5:开源控制器——POX
(一)基本要求
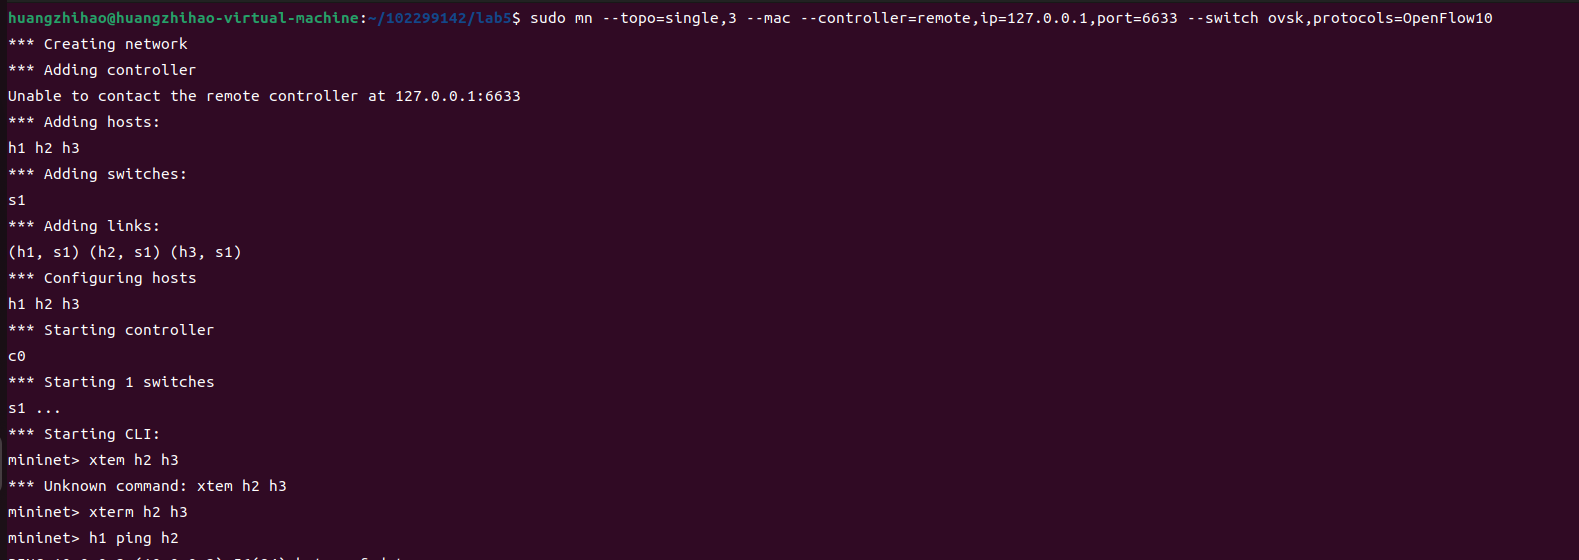
1.搭建下图所示SDN拓扑,协议使用Open Flow 1.0,控制器使用部署于本地的POX(默认监听6633端口);
-
搭建拓扑结构如下

-
使用命令搭建拓扑结构
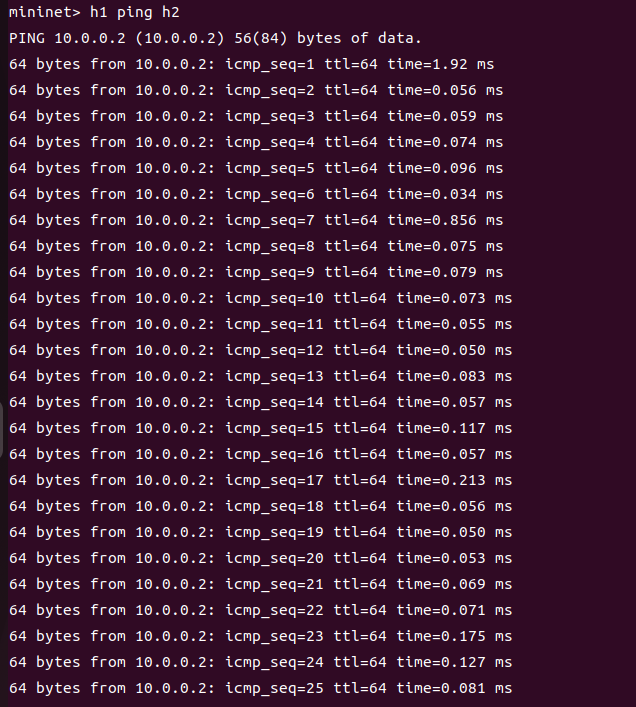
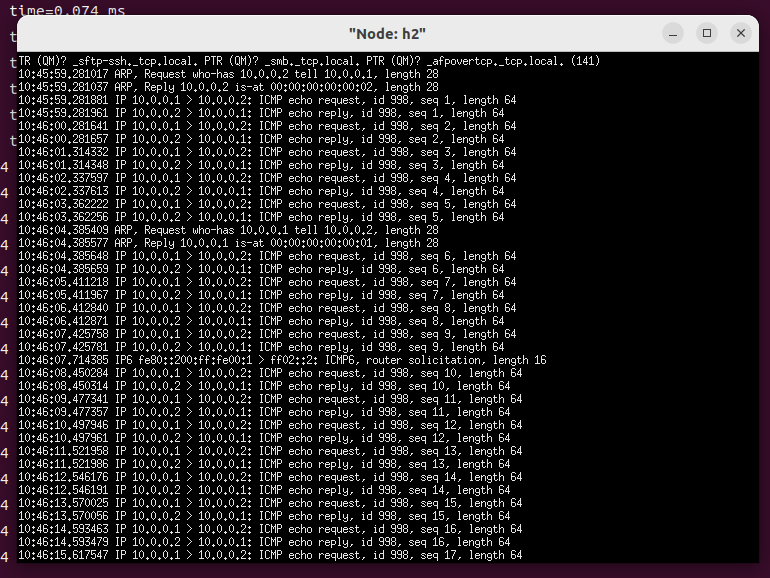
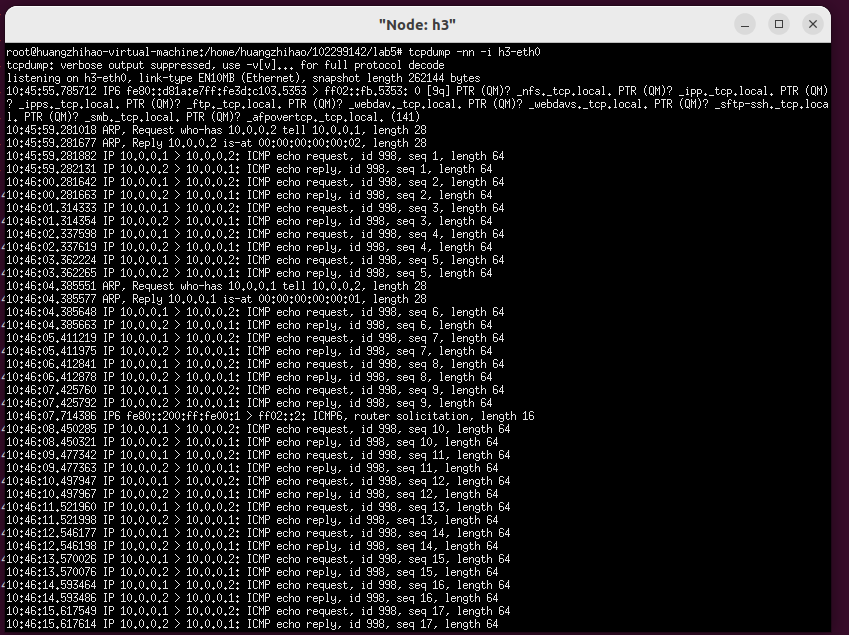
2、阅读Hub模块代码,使用 tcpdump 验证Hub模块;
- h1 ping h2 结果如下(h2与h3均能收到数据包)
- h1 ping h3 结果如下 (h2与h3均能收到数据包)
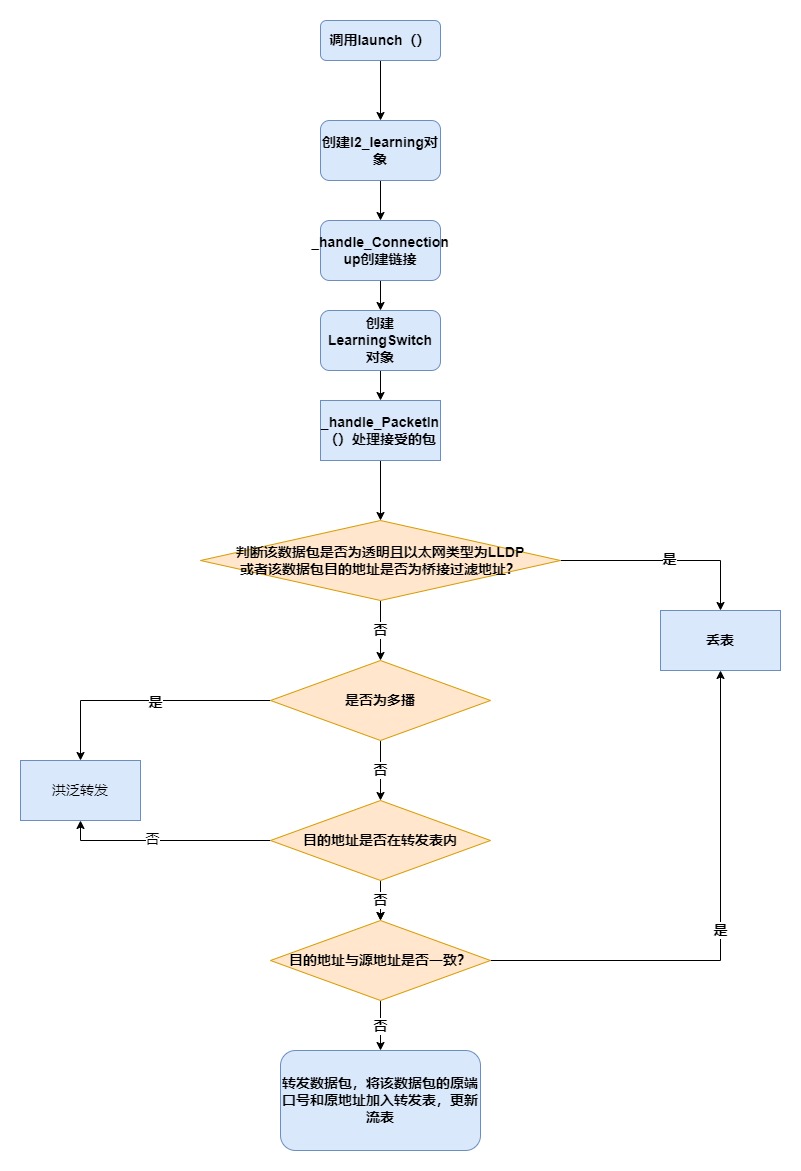
3、阅读L2_learning模块代码,画出程序流程图,使用 tcpdump 验证Switch模块。
(1)流程图
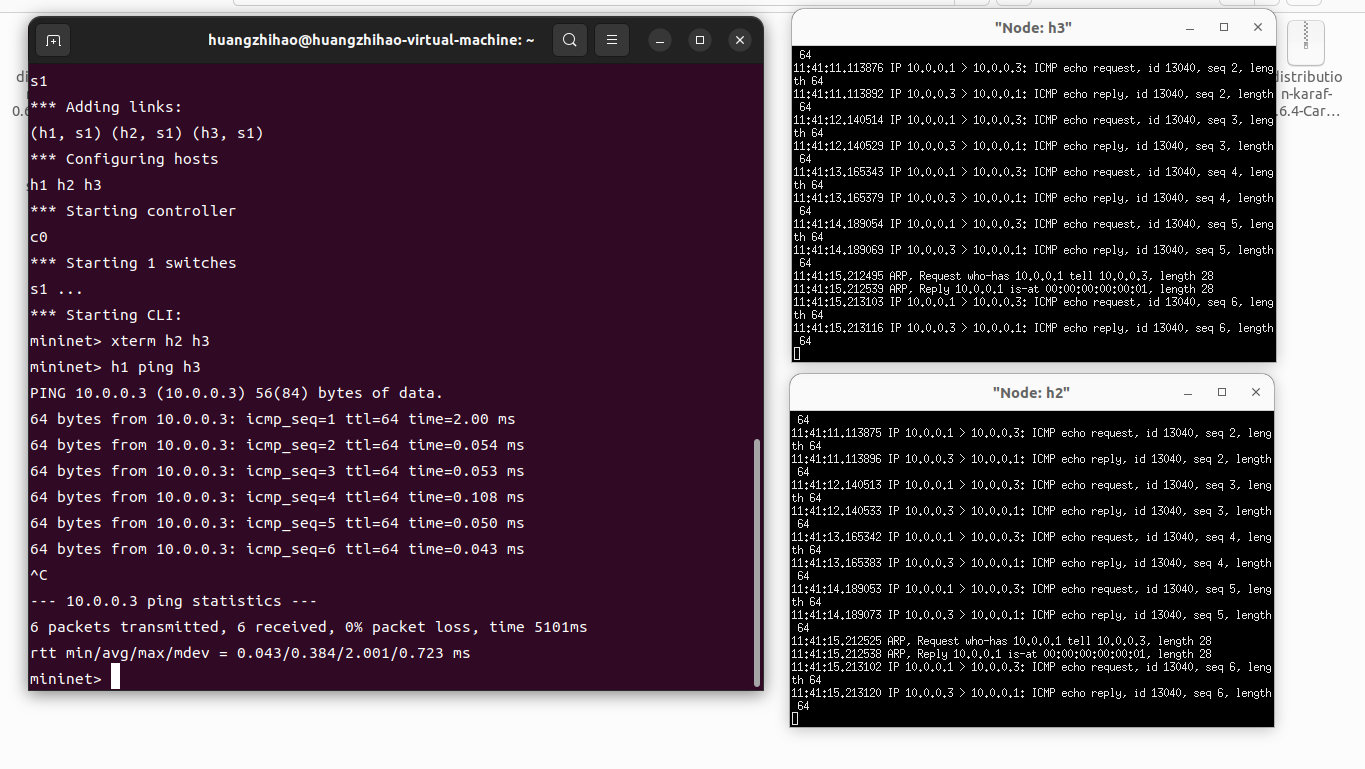
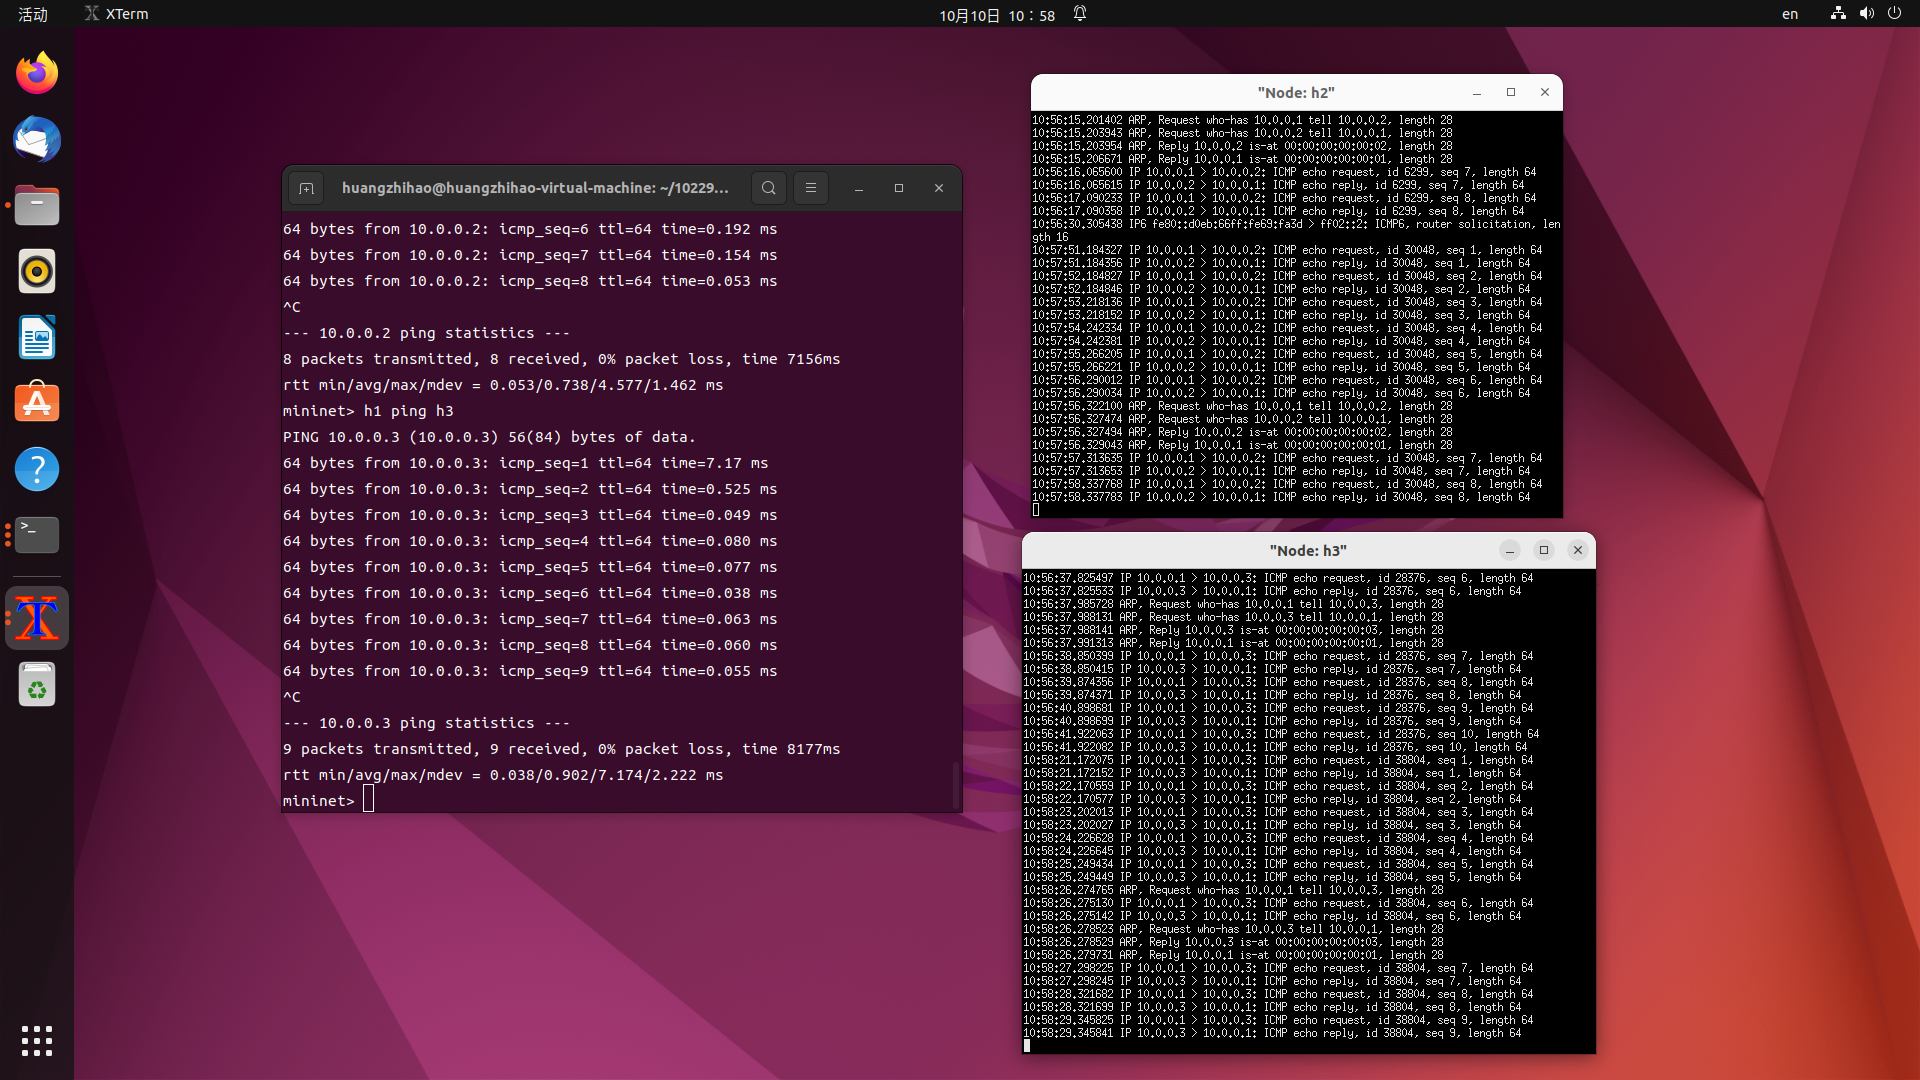
(2)使用 tcpdump 验证Switch模块
-
h1 ping h2

-
h1 ping h3
(二)进阶要求
1、重新搭建(一)的拓扑,此时交换机内无流表规则,拓扑内主机互不相通;编写Python程序自定义一个POX模块SendFlowInSingle3,并且将拓扑连接至SendFlowInSingle3(默认端口6633),实现向s1发送流表规则使得所有主机两两互通。
- 使用命令 dpctl del——flows 删除所有流表,使所有主机无法通信

- 编写SendFlowInSingle3模块
from pox.core import core
import pox.openflow.libopenflow_01 as of

class SendFlowInSingle3(object):
    def __init__ (self):
        core.openflow.addListeners(self)
    def _handle_ConnectionUp(self, event):
        msg = of.ofp_flow_mod()
        msg.priority = 1
        msg.match.in_port = 1
        msg.actions.append(of.ofp_action_output(port=2))
        msg.actions.append(of.ofp_action_output(port=3))
        event.connection.send(msg)
        msg = of.ofp_flow_mod()
        msg.priority = 1
        msg.match.in_port = 2
        msg.actions.append(of.ofp_action_output(port=1))
        msg.actions.append(of.ofp_action_output(port=3))
        event.connection.send(msg)
        msg = of.ofp_flow_mod()
        msg.priority = 1
        msg.match.in_port = 3
        msg.actions.append(of.ofp_action_output(port=1))
        msg.actions.append(of.ofp_action_output(port=2))
        event.connection.send(msg)
def launch():
    core.registerNew(SendFlowInSingle3)
- 运行SendFlowInSingle3模块,使所有主机两辆通信

2、基于进阶1的代码,实现ODL实验的硬超时功能
- 修改代码如下
from pox.core import core

import pox.openflow.libopenflow_01 as of

from pox.openflow.of_json import *


def _handle_ConnectionUp(event):

    msg = of.ofp_flow_mod()

    msg.priority = 1

    msg.match.in_port = 1

    msg.actions.append(of.ofp_action_output(port=2))

    #msg.actions.append(of.ofp_action_output(port=3))

    event.connection.send(msg)


    msg = of.ofp_flow_mod()

    msg.priority = 1

    msg.match.in_port = 2

    msg.actions.append(of.ofp_action_output(port=1))

    msg.actions.append(of.ofp_action_output(port=3))

    event.connection.send(msg)


    msg = of.ofp_flow_mod()

    msg.priority = 1

    msg.match.in_port = 3

    #msg.actions.append(of.ofp_action_output(port=1))

    msg.actions.append(of.ofp_action_output(port=2))

    event.connection.send(msg)


def launch():

    core.openflow.addListenerByName("ConnectionUp", _handle_ConnectionUp)
-ODL硬超时的实现

3、个人感想
- (1)、本次实验我学习了如何使用pox控制器对控制器和交换机之间的通信进行控制
- (2)、本次实验主要是花费了较多的时间在阅读pox文件的模块代码上,因为本人并没有Python编程的基础,所以理解这些模块代码较为困难,花费了较多的时间,但是也让我对这些模块代码的编写有了一定程度的了解,提高了本人的编程能力。
- (3)、在本次实验中我也明白了使用较为基础的方式编写pox模块文件来达到对控制器和交换机之间通信的控制。
原文地址:http://www.cnblogs.com/jode-hirons/p/16784089.html
1. 本站所有资源来源于用户上传和网络,如有侵权请邮件联系站长!
2. 分享目的仅供大家学习和交流,请务用于商业用途!
3. 如果你也有好源码或者教程,可以到用户中心发布,分享有积分奖励和额外收入!
4. 本站提供的源码、模板、插件等等其他资源,都不包含技术服务请大家谅解!
5. 如有链接无法下载、失效或广告,请联系管理员处理!
6. 本站资源售价只是赞助,收取费用仅维持本站的日常运营所需!
7. 如遇到加密压缩包,默认解压密码为"gltf",如遇到无法解压的请联系管理员!
8. 因为资源和程序源码均为可复制品,所以不支持任何理由的退款兑现,请斟酌后支付下载
声明:如果标题没有注明"已测试"或者"测试可用"等字样的资源源码均未经过站长测试.特别注意没有标注的源码不保证任何可用性