
kubeadm创建kubernetes集群
参照 使用Kubeadm引导集群,进行集群的创建。
一、安装kubeadm
1.1 准备开始
这里我准备了3台服务器进行安装,均是通过Vbox创建centos7.6版本的虚拟机。
| 序号 | 服务器名称 | IP | CPU(核数) | 内存(G) |
|---|---|---|---|---|
| 1 | centos204 | 192.168.16.204 | 2 | 3 |
| 2 | centos205 | 192.168.16.205 | 2 | 3 |
| 3 | centos206 | 192.168.16.206 | 2 | 3 |
1.2 环境配置
1.2.1 确保节点 MAC 地址和 product_uuid 的唯一性(ALL)
节点不唯一,可能导致安装失败。
-
快使用名称
ip link或ifconfig -a来获取网络接口的 MAC 地址。[root@centos204 ~]# ip link 1: lo: <LOOPBACK,UP,LOWER_UP> mtu 65536 qdisc noqueue state UNKNOWN mode DEFAULT qlen 1 link/loopback 00:00:00:00:00:00 brd 00:00:00:00:00:00 2: enp0s3: <BROADCAST,MULTICAST,UP,LOWER_UP> mtu 1500 qdisc pfifo_fast state UP mode DEFAULT qlen 1000 link/ether 08:00:27:ab:b0:4d brd ff:ff:ff:ff:ff:ff [root@centos204 ~]#如上,通过
ip link命令可以查看到centos204网卡 enp0s3 mac地址为08:00:27:ab:b0:4d。另外两台服务器网卡enp0s3 mac地分别为08:00:27:6c:08:5c和08:00:27:b5:46:22, 三者mac地址是互不相同的。 -
可以使用
sudo cat /sys/class/dmi/id/product_uuid结果分别如下,
FD6EA9D0-88FC-8443-9A2D-37255D5B651D
59E20534-EC75-C149-BF65-21555E724AC9
4C4F4BF4-9C24-A24F-876A-FC361EF0372D
1.2.2 升级系统内核(ALL)
如不升级系统内核,仍使用当前3.10版本内核,则会出现内存泄露问题,参考Kubernetes CentOS7.4 系统内核升级 修复 K8S 内存泄露问题。
执行uname -r命令,可以查看当前系统内核版本。
uname -r
易知当前内核版本为3.10.0版本。
版本过低,为此,我们升级内核(见 [1])(对所有服务器)。
使用阿里云yum源,并更新yum源:
mv -y /etc/yum.repos.d/CentOS-Base.repo /etc/yum.repos.d/CentOS-Base.repo.backup
curl -o /etc/yum.repos.d/CentOS-Base.repo https://mirrors.aliyun.com/repo/Centos-7.repo
curl -o /etc/yum.repos.d/epel.repo http://mirrors.aliyun.com/repo/epel-7.repo
yum clean all && yum -y update
启动elrepo仓库。
rpm --import https://www.elrepo.org/RPM-GPG-KEY-elrepo.org
rpm -Uvh http://www.elrepo.org/elrepo-release-7.0-4.el7.elrepo.noarch.rpm
查看可用内核包。
yum --disablerepo="*" --enablerepo="elrepo-kernel" list available
可以看到可用的内核版本,这里是6.0.7版本。安装该版本内核。
yum --enablerepo=elrepo-kernel install -y kernel-ml
查看已安装的可用内核:
awk -F\' '$1=="menuentry " {print i++ " : " $2}' /etc/grub2.cfg
选择并设置序号为0的新增内核为grub2的默认版本。
grub2-set-default 0
生成 grub 配置文件并重启。
grub2-mkconfig -o /boot/grub2/grub.cfg
reboot
验证内核使用。
uname -r
1.2.3 同步服务器时区和时间(ALL)
安装ntpdate
yum -y install ntpdate
创建定时任务,定时同步服务器时间。
编辑定时任务。
crontab -e
写入定时任务执行,每10分钟执行一次。
*/10 * * * * /usr/sbin/ntpdate -u time.pool.aliyun.com
1.2.4 关闭防火墙(ALL)
systemctl stop firewalld
systemctl disable firewalld
1.2.5 禁用 SELINUX(ALL)
先手动禁用SELINUX。
setenforce 0
再修改对应配置文件(/etc/selinux/config),使服务重启禁用也生效。
SELINUX=disabled
1.2.6 禁用 swap (ALL)
手动使之生效。
swapoff -a
修改/etc/fstab文件,注释掉 swap 自动挂载。通过free -m命令查看禁用状态。
1.2.7 安装ipvs(ALL)
ipvs 称之为 IP 虚拟机(IP Virtual Server, 简称IPVS),是运行在 LVS 下的提供负载平衡功能的一种技术。kube-proxy会用到 ipvs。
安装相关的依赖包。
yum install -y ipvsadm ipset
开启ipvs转发。
cat > /etc/sysconfig/modules/ipvs.modules << EOF
#!/bin/bash
modprobe -- ip_vs
modprobe -- ip_vs_rr
modprobe -- ip_vs_wrr
modprobe -- ip_vs_sh
modprobe -- nf_conntrack
EOF
启用 ipvs模块。
chmod 755 /etc/sysconfig/modules/ipvs.modules

bash /etc/sysconfig/modules/ipvs.modules

lsmod | grep -e ip_vs -e nf_conntrack
1.2.8 安装docker*(ALL)
使用官方安装脚本自动安装。
curl -fsSL https://get.docker.com | bash -s docker --mirror Aliyun
1.2.9 安装其他依赖包(ALL)
yum install nfs-common nfs-utils bpftools -y
1.3 安装容器运行时
为了在Pod中运行容器,需要安装和使用的是容器运行时(Container Runtime)。默认情况下,Kubernetes 使用 容器运行时接口(Container Runtime Interface,CRI) 来与你所选择的容器运行时交互。
这里的容器运行时也可以使用docker容器,但是必须安装额外的服务cri-docked。
Linux操作系统支持的运行时。
| 运行时运行时 | Unix域套接字 |
|---|---|
| containerd | unix:///var/run/containerd/containerd.sock |
| CRI-O | unix:///var/run/crio/crio.sock |
| Docker Engine(使用 cri-dockerd) | unix:///var/run/cri-dockerd.sock |
这里我们安装默认的containerd运行时。
1.3.1 转发 IPv4 并让 iptables 看到桥接流量(ALL)
通过运行 lsmod | grep br_netfilter 来验证 br_netfilter 模块是否已加载。
若要显式加载此模块,请运行 sudo modprobe br_netfilter。
为了让 Linux 节点的 iptables 能够正确查看桥接流量,请确认 sysctl 配置中的 net.bridge.bridge-nf-call-iptables 设置为 1。例如:
cat <<EOF | sudo tee /etc/modules-load.d/k8s.conf
overlay
br_netfilter
EOF

sudo modprobe overlay
sudo modprobe br_netfilter

# 设置所需的 sysctl 参数,参数在重新启动后保持不变
cat <<EOF | sudo tee /etc/sysctl.d/k8s.conf
net.bridge.bridge-nf-call-iptables  = 1
net.bridge.bridge-nf-call-ip6tables = 1
net.ipv4.ip_forward                 = 1
EOF

# 应用 sysctl 参数而不重新启动
sudo sysctl --system
1.3.2 安装containerd
参照containerd安装入门,我们通过官方的二进制文件进行安装。
1.3.2.1 安装containerd(ALL)
在containerd发布地址下,下载特定的发布版本,这里我们下载containerd-1.6.9-linux-amd64.tar.gz。
下载好后,将其上传至服务器并解压到/usr/local目录下。
tar Cxzvf /usr/local containerd-1.6.9-linux-amd64.tar.gz
如果要通过systemd启动containerd,需要下载containerd.service文件,并且把该文件放置到/usr/local/lib/systemd/system/containerd.service目录下。
注:如果下载不下来,可以先ping一下
raw.githubusercontent.com(或www.githubusercontent.com)的IP,将该IP地址填入到hosts文件里面,再重试。
配置containerd相关配置文件。
将默认的配置文件设置为/etc/containerd/config.toml文件。
containerd config default > /etc/containerd/config.toml
对该文件进行编辑,对立面的2项配置项进行变更。
-
SystemdCgroup
将该值
SystemdCgroup= false,变更为SystemdCgroup = true。 -
sandbox_image
将沙箱镜像值
registry.k8s.io/pause:3.6,改为registry.aliyuncs.com/google_containers/pause:3.6。 -
镜像注册
在镜像注册设置的地方
 [plugins."io.containerd.grpc.v1.cri".registry]
      config_path = ""

      [plugins."io.containerd.grpc.v1.cri".registry.auths]

      [plugins."io.containerd.grpc.v1.cri".registry.configs]

      [plugins."io.containerd.grpc.v1.cri".registry.headers]

      [plugins."io.containerd.grpc.v1.cri".registry.mirrors]

    [plugins."io.containerd.grpc.v1.cri".x509_key_pair_streaming]
      tls_cert_file = ""
      tls_key_file = ""
在
[plugins."io.containerd.grpc.v1.cri".registry.mirrors]的下方,添加docker.io和k8s.gcr.io的国内镜像。[plugins."io.containerd.grpc.v1.cri".registry.mirrors."docker.io"] endpoint = ["https://xxxxxx.mirror.aliyuncs.com", "http://hub-mirror.c.163.com" , "https://docker.mirrors.ustc.edu.cn/"] [plugins."io.containerd.grpc.v1.cri".registry.mirrors."k8s.gcr.io"] endpoint = ["registry.aliyuncs.com/google_containers"]
配置完成后,重启containerd。
systemctl daemon-reload
systemctl enable --now containerd
或
systemctl daemon-reload
systemctl restart containerd
说明: 这里的相关配置会影响
kubeadm初始化的设置,因此要一次性配置好,不能在事后配置。
1.3.2.2 安装runc(ALL)
到runc发布网页上下载runc.<ARCH>二进制包,这里我们下载runc.amd64文件,并将其上传到服务器。执行安装,将其安装为/usr/local/sbin/runc。
install -m 755 runc.amd64 /usr/local/sbin/runc
1.3.2.3 安装CNI插件(ALL)
在容器网络工作插件发布网页里面,下载cni-plugins-<OS>-<ARCH>-<VERSION>.tgz文件,这里我们下载cni-plugins-linux-amd64-v1.1.1.tgz,并将其解压到/opt/cni/bin目录下。
mkdir -p /opt/cni/bin
tar Cxzvf /opt/cni/bin cni-plugins-linux-amd64-v1.1.1.tgz
1.4 安装kubeadm、kubelet 和 kubectl (ALL)
配置仓库, 因为网络原因,我们这里使用阿里云的仓库配置进行安装。
cat <<EOF | sudo tee /etc/yum.repos.d/kubernetes.repo
[kubernetes]
name=Kubernetes
baseurl=https://mirrors.aliyun.com/kubernetes/yum/repos/kubernetes-el7-x86_64/
enabled=1
gpgcheck=0
repo_gpgcheck=0
gpgkey=https://mirrors.aliyun.com/kubernetes/yum/doc/yum-key.gpg https://mirrors.aliyun.com/kubernetes/yum/doc/rpm-package-key.gpg
EOF
注意:这里需要将
gpgcheck和repo_gpgcheck都赋值为0。否则会出现校验失败导致的问题:
9.1 failure: repodata/repomd.xml from kubernetes: [Errno 256] No more mirrors to try
将 SELinux 设置为 permissive 模式(相当于将其禁用)
sudo setenforce 0
sudo sed -i 's/^SELINUX=enforcing$/SELINUX=permissive/' /etc/selinux/config
安装kubelet kubeadm kubectl, 并启动kubelet。
# 这一步执行进行变更
sudo yum install -y kubelet kubeadm kubectl --disableexcludes=kubernetes

sudo systemctl enable --now kubelet
这时,kubelet 每隔几秒就会重启,它在等待 kubeadm 的指令。
二、使用kubeadm创建集群
2.1 初始话平面节点(204)
2.1.1 准备集群所需的镜像
kubeadm config images list --kubernetes-version=v1.25.3
我们准备安装1.25.3版本的 kubernetes。
2.1.2 初始化平面节点
执行之前,先下载并重命名pause:3.6镜像。
ctr -n k8s.io image pull registry.aliyuncs.com/google_containers/pause:3.6
ctr -n k8s.io image tag registry.aliyuncs.com/google_containers/pause:3.6 registry.k8s.io/pause:3.6
执行平面节点初始化。
kubeadm init \
--control-plane-endpoint=192.168.16.204 \
--apiserver-advertise-address=192.168.16.204 \
--image-repository registry.aliyuncs.com/google_containers \
--kubernetes-version v1.25.3 \
--service-cidr=192.96.0.0/16 \
--pod-network-cidr=192.244.0.0/16
其中,
-
–control-plane-endpoint
为控制平面指定的一个稳定的 IP 地址或 DNS 名称。
-
–apiserver-advertise-address
API 服务器所公布的其正在监听的 IP 地址。
-
–image-repository
镜像仓库地址,这里我们使用阿里镜像。
-
–kubernetes-version
k8s 版本。
-
–service-cidr
为服务的虚拟 IP 地址另外指定 IP 地址段。
-
–pod-network-cidr
指明 pod 网络可以使用的 IP 地址段。
执行成功,会出现以下信息。
[kubelet-finalize] Updating "/etc/kubernetes/kubelet.conf" to point to a rotatable kubelet client certificate and key
[addons] Applied essential addon: CoreDNS
[addons] Applied essential addon: kube-proxy

Your Kubernetes control-plane has initialized successfully!

To start using your cluster, you need to run the following as a regular user:

  mkdir -p $HOME/.kube
  sudo cp -i /etc/kubernetes/admin.conf $HOME/.kube/config
  sudo chown $(id -u):$(id -g) $HOME/.kube/config

Alternatively, if you are the root user, you can run:

  export KUBECONFIG=/etc/kubernetes/admin.conf

You should now deploy a pod network to the cluster.
Run "kubectl apply -f [podnetwork].yaml" with one of the options listed at:
  https://kubernetes.io/docs/concepts/cluster-administration/addons/

Then you can join any number of worker nodes by running the following on each as root:

kubeadm join 192.168.16.204:6443 --token iv0wk6.tu57bo7xm3e296z7 \
        --discovery-token-ca-cert-hash sha256:f31f18f2cde508668fa721743bae0dc3bfa65302d4c548d129de274820ff0b84
根据提示信息,我们进行相关操作。将admin.conf配置信息,设置到特定路径下。
mkdir -p $HOME/.kube
sudo cp -i /etc/kubernetes/admin.conf $HOME/.kube/config
sudo chown $(id -u):$(id -g) $HOME/.kube/config
同时,设置环境变量设置到/etc/profile文件内。
export KUBECONFIG=/etc/kubernetes/admin.conf
设置完后,我们查看一下当前节点的状态。
执行以下命令,
kubectl get nodes
可以看到输出结果。
NAME        STATUS     ROLES           AGE   VERSION
centos204   NotReady   control-plane   54m   v1.25.3
这时,可以发现 主节点,未就绪状态(NotReady)。
查看日志输出,
tailf -30 /var/log/messages
这时,可以看到服务一直在循环打印以下信息。
kubelet.go:2373] "Container runtime network not ready" networkReady="NetworkReady=false reason:NetworkPluginNotReady message:Network plugin returns error: cni plugin not initialized"
这是因为没有安装对应的网络组件。这里我们选择安装Calico。
2.1.3 安装网络附加组件
我们安装calico。
第一步,先安装tigera-operator。
kubectl create -f https://raw.githubusercontent.com/projectcalico/calico/v3.24.5/manifests/tigera-operator.yaml
第二步,安装自定义资源custom-resources。
先将自定义资源文件custom-resources.yaml下载到本地。
修改该文件。
# This section includes base Calico installation configuration.
# For more information, see: https://projectcalico.docs.tigera.io/master/reference/installation/api#operator.tigera.io/v1.Installation
apiVersion: operator.tigera.io/v1
kind: Installation
metadata:
  name: default
spec:
  # Configures Calico networking.
  calicoNetwork:
    # Note: The ipPools section cannot be modified post-install.
    ipPools:
    - blockSize: 26
      cidr: 192.244.0.0/16
      encapsulation: VXLANCrossSubnet
      natOutgoing: Enabled
      nodeSelector: all()

---

# This section configures the Calico API server.
# For more information, see: https://projectcalico.docs.tigera.io/master/reference/installation/api#operator.tigera.io/v1.APIServer
apiVersion: operator.tigera.io/v1
kind: APIServer
metadata:
  name: default
spec: {}
先修改指定的文件网络地址路由spec.calicoNetwork.ipPools.cidr,将其值由默认的192.168.0.0/16变更为pod-network-cidr设置的值192.244.0.0/16。
修改完后,执行Calico相关文件的创建工作。
kubectl create -f custom-resources.yaml
执行过程中,需要下载相关的镜像。
docker.io/calico/typha:v3.24.5
docker.io/calico/cni:v3.24.5
docker.io/calico/pod2daemon-flexvol:v3.24.5
有可能需要安装docker-ce。
第三步,查看对应的pod的创建情况。
kubectl get pods -n calico-system
可以看到,相应的容器都已创建并正常运行。
NAME                                       READY   STATUS    RESTARTS   AGE
calico-kube-controllers-6866fd8fdd-rqppz   1/1     Running   0          138m
calico-node-vld2r                          1/1     Running   0          138m
calico-typha-f96c76ff5-52vws               1/1     Running   0          138m
如果没有,正常运行,可以分别查看对应的日志输出,排查对应的问题。
kubectl describe pod calico-node-vld2r -n calico-system
或
kubectl logs calico-node-vld2r -n calico-system
最后,通过命令(kubectl get node)看一下节点的状态这时可以看到节点已经正常。
NAME        STATUS   ROLES           AGE    VERSION
centos204   Ready    control-plane   4d4h   v1.25.3
查看kube-system命名空间下的 pod启动和运行情况,
kubectl get pod -n kube-system
发现,也都是正常状态。
NAME                                READY   STATUS    RESTARTS   AGE
coredns-c676cc86f-bhsh8             1/1     Running   0          4d4h
coredns-c676cc86f-x9bm5             1/1     Running   0          4d4h
etcd-centos204                      1/1     Running   2          4d4h
kube-apiserver-centos204            1/1     Running   2          4d4h
kube-controller-manager-centos204   1/1     Running   2          4d4h
kube-proxy-b4kbv                    1/1     Running   0          4d4h
kube-scheduler-centos204            1/1     Running   2          4d4h
2.1.4 将初始化的信息清除重置*
如果初始化失败或要取消之前的设置,并重新初始化,则可使用重置命令。执行过之后,再执行初始化(kubeadm init)等操作。
kubeadm reset
提示是否删除之前相关设置,填入y即可。
如果要在重置之前将网络附加组件相关设置删除,执行。
kubectl delete -f custom-resources.yaml
2.2 将其他worker节点加入平面(205、206)
分别在不同的节点,执行:
ctr -n k8s.io image pull registry.aliyuncs.com/google_containers/pause:3.6
ctr -n k8s.io image tag registry.aliyuncs.com/google_containers/pause:3.6 registry.k8s.io/pause:3.6
执行过后执行节点的添加:
kubeadm join 192.168.16.204:6443 --token iv0wk6.tu57bo7xm3e296z7 --discovery-token-ca-cert-hash sha256:f31f18f2cde508668fa721743bae0dc3bfa65302d4c548d129de274820ff0b84
可以看到,节点已经加入的信息。
[preflight] Running pre-flight checks
[preflight] Reading configuration from the cluster...
[preflight] FYI: You can look at this config file with 'kubectl -n kube-system get cm kubeadm-config -o yaml'
[kubelet-start] Writing kubelet configuration to file "/var/lib/kubelet/config.yaml"
[kubelet-start] Writing kubelet environment file with flags to file "/var/lib/kubelet/kubeadm-flags.env"
[kubelet-start] Starting the kubelet
[kubelet-start] Waiting for the kubelet to perform the TLS Bootstrap...

This node has joined the cluster:
* Certificate signing request was sent to apiserver and a response was received.
* The Kubelet was informed of the new secure connection details.

Run 'kubectl get nodes' on the control-plane to see this node join the cluster.
为了不同节点都能看到节点的相关信息。我们需要把平面节点的相关配置拷贝到worker节点上。在平面节点(centos204)上执行:
cd /etc/kubernetes/
scp admin.conf centos205:$PWD
scp admin.conf centos206:$PWD
在工作节点centos205、centos206上分别进行设置环境变量。
export KUBECONFIG=/etc/kubernetes/admin.conf
这时可以在工作节点查看所有节点的状态。
kubectl get nodes
目前所有的节点都是就绪状态。
NAME        STATUS   ROLES           AGE    VERSION
centos204   Ready    control-plane   4d6h   v1.25.3
centos205   Ready    <none>          38m    v1.25.3
centos206   Ready    <none>          38m    v1.25.3
移除节点通过下面的两步。
kubectl drain 节点名称 --delete-emptydir-data --force --ignore-daemonsets
kubectl delete node 节点名称
2.3 安装dashboard服务(204)
2.3.1 安装dashboard
先下载recommended.yaml文件(或者通过浏览器将其下载到本地再上传)。
wget https://raw.githubusercontent.com/kubernetes/dashboard/v2.7.0/aio/deploy/recommended.yaml
修改其中的相关配置,在指定的端口处添加节点端口(spec.ports.nodePort=30001), 且指定类型(spec.type=NodePort)。
kind: Service
apiVersion: v1
metadata:
  labels:
    k8s-app: kubernetes-dashboard
  name: kubernetes-dashboard
  namespace: kubernetes-dashboard
spec:
  ports:
    - port: 443
      targetPort: 8443
      nodePort: 30001
  type: NodePort
  selector:
    k8s-app: kubernetes-dashboard
应用该yaml文件。
kubectl apply -f recommended.yaml
执行过后,查看kubernetes-dashboard相关容器的运行状态。
kubectl get pods -n kubernetes-dashboard
kubectl get pods,svc -n kubernetes-dashboard
可以按到pod都处于正常运行状态。
NAME                                             READY   STATUS    RESTARTS   AGE
pod/dashboard-metrics-scraper-64bcc67c9c-hc8mb   1/1     Running   0          19h
pod/kubernetes-dashboard-5c8bd6b59-85zg6         1/1     Running   0          19h

NAME                                TYPE        CLUSTER-IP       EXTERNAL-IP   PORT(S)         AGE
service/dashboard-metrics-scraper   ClusterIP   192.96.215.247   <none>        8000/TCP        19h
service/kubernetes-dashboard        NodePort    192.96.25.66     <none>        443:30001/TCP   19h
需要注意三点:
-
需要安装最新版本的
dashboard,即v2.7.0版本(我们安装的kubenetes是1.25.3版本)。Kubernetes version 1.22 1.23 1.24 1.25 Compatibility ? ? ? ✓ ✓完全支持的版本范围。?因为Kubernetes API 版本的变更, 一些特性在Dashboard中可能不能很好的起作用。
-
需要安装官方的镜像。
kubernetesui/dashboard:v2.7.0
kubernetesui/metrics-scraper:v1.0.8
但是整个执行过程因为本地镜像下载过慢,会导致
Dashboard启动不起来,最好执行这些步骤安排在凌晨执行,这时候网速是最好的。 -
安装的
dashboard和metrics-scraper没有安装到centos204服务器上,而是kubenetes根据资源使用等规则自主分配的。kubectl get pod -n kubernetes-dashboard -o wide可以看到,都被安装到了
centos206节点上。NAME READY STATUS RESTARTS AGE IP NODE dashboard-metrics-scraper-64bcc67c9c-hc8mb 1/1 Running 0 15h 192.244.202.30 centos206 kubernetes-dashboard-5c8bd6b59-85zg6 1/1 Running 0 15h 192.244.202.29 centos206
2.3.2 创建dashboard用户
下载dashboard-user.yaml文件(或者通过浏览器将其下载到本地再上传)。
wget https://raw.githubusercontent.com/cby-chen/Kubernetes/main/yaml/dashboard-user.yaml
该文件主要包含以下信息:
apiVersion: v1
kind: ServiceAccount
metadata:
  name: admin-user
  namespace: kubernetes-dashboard
---
apiVersion: rbac.authorization.k8s.io/v1
kind: ClusterRoleBinding
metadata:
  name: admin-user
roleRef:
  apiGroup: rbac.authorization.k8s.io
  kind: ClusterRole
  name: cluster-admin
subjects:
- kind: ServiceAccount
  name: admin-user
  namespace: kubernetes-dashboard
执行用户的创建。
kubectl apply -f dashboard-user.yaml
执行成功。可以看到完成了服务帐号的创建和集群角色的授权。
serviceaccount/admin-user created
clusterrolebinding.rbac.authorization.k8s.io/admin-user created
查看创建的服务账号信息。
kubectl get serviceaccount -n kubernetes-dashboard
得到:
NAME                   SECRETS   AGE
admin-user             0         42m
default                0         20h
kubernetes-dashboard   0         20h
删除用户信息。
kubectl delete -f dashboard-user.yaml
或者
 kubectl delete serviceaccount admin-user -n kubernetes-dashboard
 kubectl delete clusterrolebinding admin-user
2.3.3 创建令牌
执行令牌的创建。
kubectl -n kubernetes-dashboard create token admin-user
这时会输出对应的令牌值:
eyJhbGciOiJSUzI1NiIsImtpZCI6InI3R1JUbmJINEhUemx6Ui00djN0cVFSUEZnT19OT3RQQzhnZERrRDJfYUUifQ.eyJhdWQiOlsiaHR0cHM6Ly9rdWJlcm5ldGVzLmRlZmF1bHQuc3ZjLmNsdXN0ZXIubG9jYWwiXSwiZXhwIjoxNjY4NTg3NDA0LCJpYXQiOjE2Njg1ODM4MDQsImlzcyI6Imh0dHBzOi8va3ViZXJuZXRlcy5kZWZhdWx0LnN2Yy5jbHVzdGVyLmxvY2FsIiwia3ViZXJuZXRlcy5pbyI6eyJuYW1lc3BhY2UiOiJrdWJlcm5ldGVzLWRhc2hib2FyZCIsInNlcnZpY2VhY2NvdW50Ijp7Im5hbWUiOiJhZG1pbi11c2VyIiwidWlkIjoiZjM3NTM5M2MtYWNjNy00YzBkLTk4YjgtOTllNWZmNzQwMjRmIn19LCJuYmYiOjE2Njg1ODM4MDQsInN1YiI6InN5c3RlbTpzZXJ2aWNlYWNjb3VudDprdWJlcm5ldGVzLWRhc2hib2FyZDphZG1pbi11c2VyIn0.Q2gyrH7bMUCZRjMQoYDJdXAoHDMs6PS2OmKzfoSxar8JGn-sijYmq0Nvhgu20oeNi4YFafPe_iSndh015k5aKBp1jnYl7yK32UU7Ru7Ak0X2fS5_6bGvKL3SykGRxInBaTpqXfx-rpCAsst2Xp_ibh9gkPhfjvoaO2fJk01-lx5ENZNaQmenHXb-Vydlz182sF0BTKgZEMOZYp-WYCKCk7giqtvghX6xPIZfAVoNyiEqvR3b9l1Z1qv2BJVQI16zDmxJODNXAELvFKsvo9uLB21LjrWIRU2MgyCs01TG7mZ9OB4IPFCmAHw8_SvPzQFon28Sfrmr2CwqqyoSNU_vyQ
2.3.4 访问dashboard
通过浏览器访问:(https://192.168.16.204:30001/#/login)
该地址IP即centos204服务的IP。
端口即2.3.1 安装dashboard所设置的节点端口(nodePort)值。
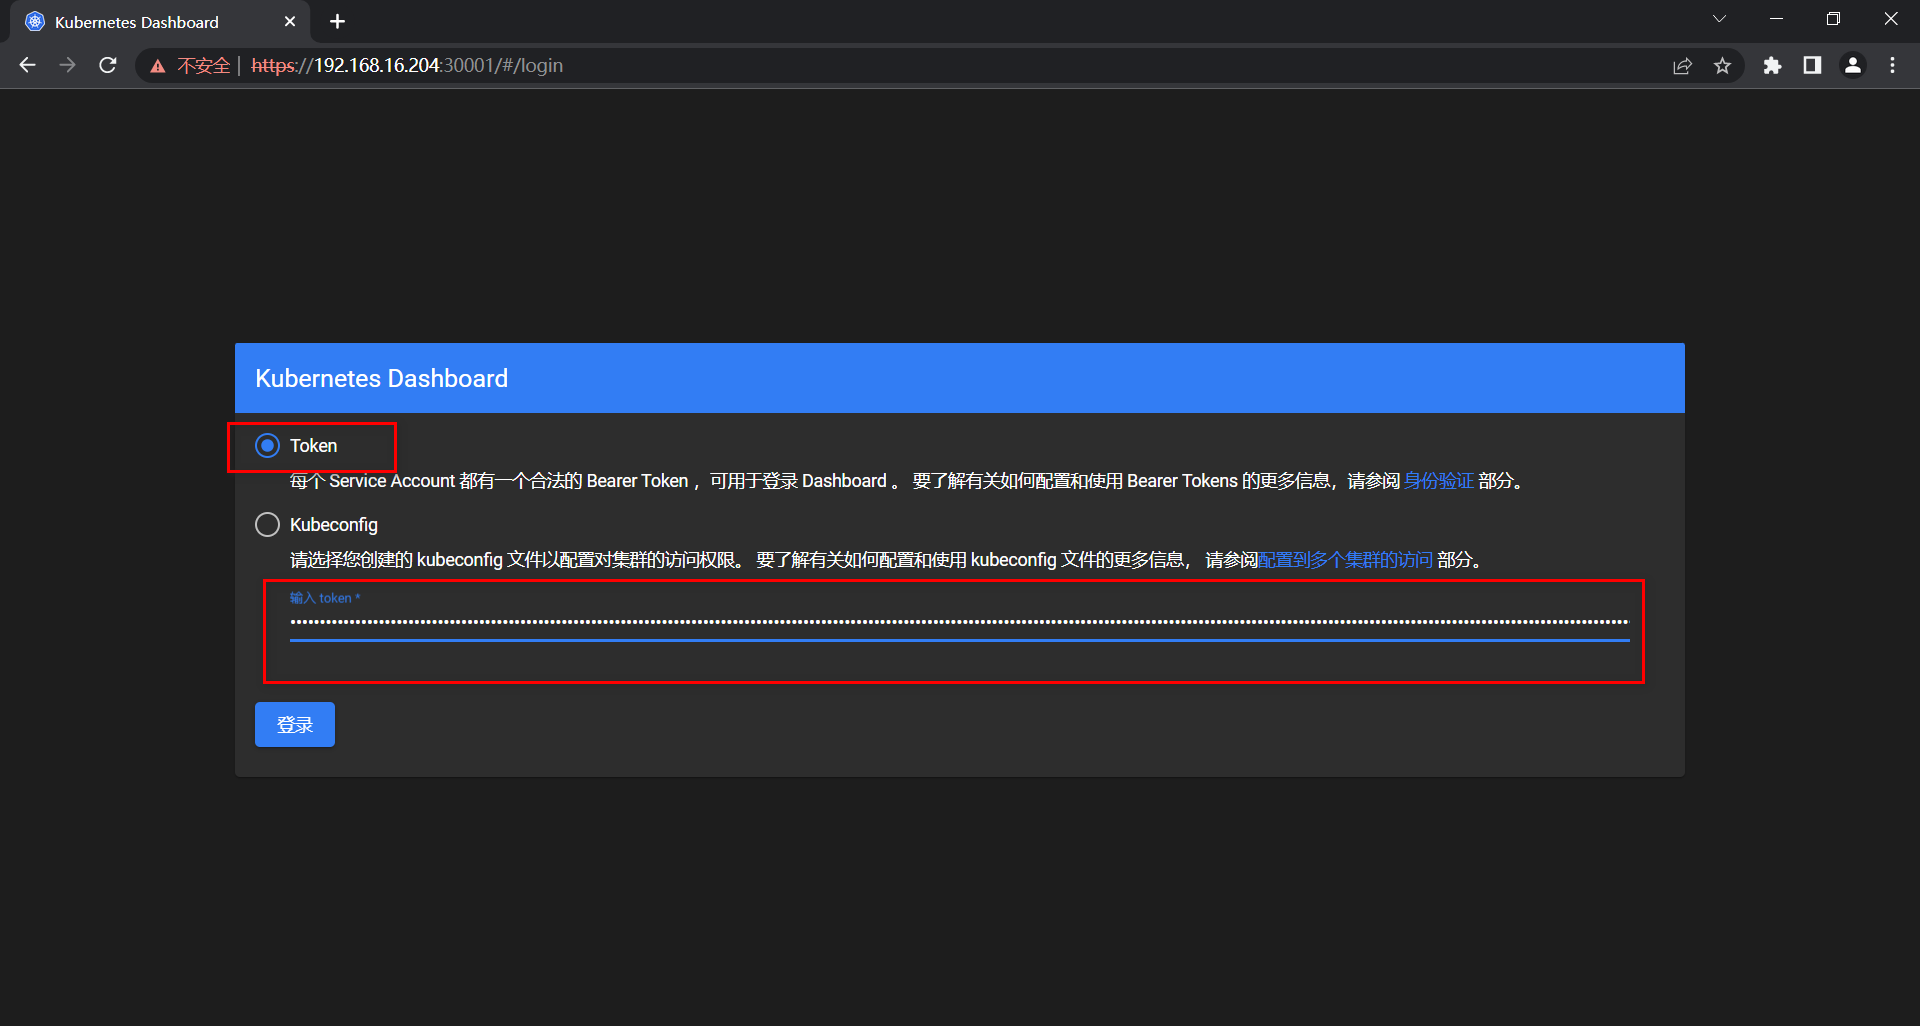
我们选择以令牌(token)方式登录,并输入上一步得到的令牌,点击登录。这时我们即可登录进Dashboard,并可以查看或操作相关安装或部署的信息。
2.4 安装mysql
2.4.1 安装副本控制器
准备mysql-rc.yaml文件。
apiVersion: v1
kind: ReplicationController
metadata:
  name: mysql
spec:
  replicas: 1
  selector:
    app: mysql
  template:
    metadata:
      labels:
        app: mysql
    spec:
      containers:
      - name: mysql
        image: mysql
        ports:
        - containerPort: 3306
        env:
        - name: MYSQL_ROOT_PASSWORD
          value: "123456"
执行安装命令。
kubectl create -f mysql-rc.yaml
查看对应的pod的创建情况。
kubectl get pods
查看结果:
NAME          READY   STATUS    RESTARTS   AGE
mysql-stc8k   1/1     Running   0          19h
2.4.2 安装服务
准备mysql-svc.yaml文件。
apiVersion: v1
kind: Service
metadata:
  name: mysql
spec:
  type: NodePort
  ports:
    - port: 3306
      nodePort: 30006
  selector:
    app: mysql
执行创建命令:
kubectl create -f mysql-svc.yaml
查看创建的结果:
kubectl get services -o wide
NAME         TYPE        CLUSTER-IP       EXTERNAL-IP   PORT(S)          AGE   SELECTOR
mysql        NodePort    192.96.216.184   <none>        3306:30006/TCP   39s   app=mysql
2.4.3 验证访问
我们尝试通过外部访问创建的mysql程序。
我们尝试通过 SQL 连接工具HediSQL进行连接。
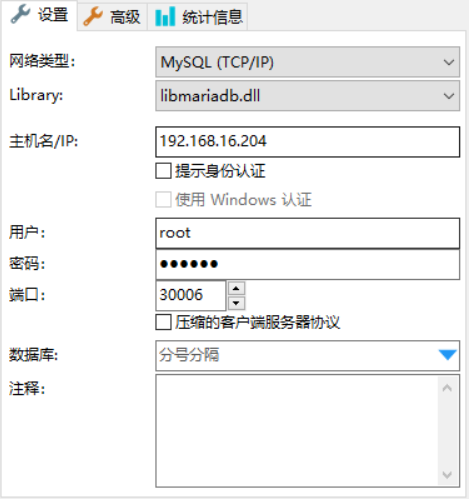
填入必要的信息:
-
主机IP
即
centos204所在的IP。 -
用户密码
即2.4.1 安装副本控制器中设置的账号密码。
-
端口
即2.4.2 安装服务中设置的映射到外网的端口(
nodePort = 30006)。
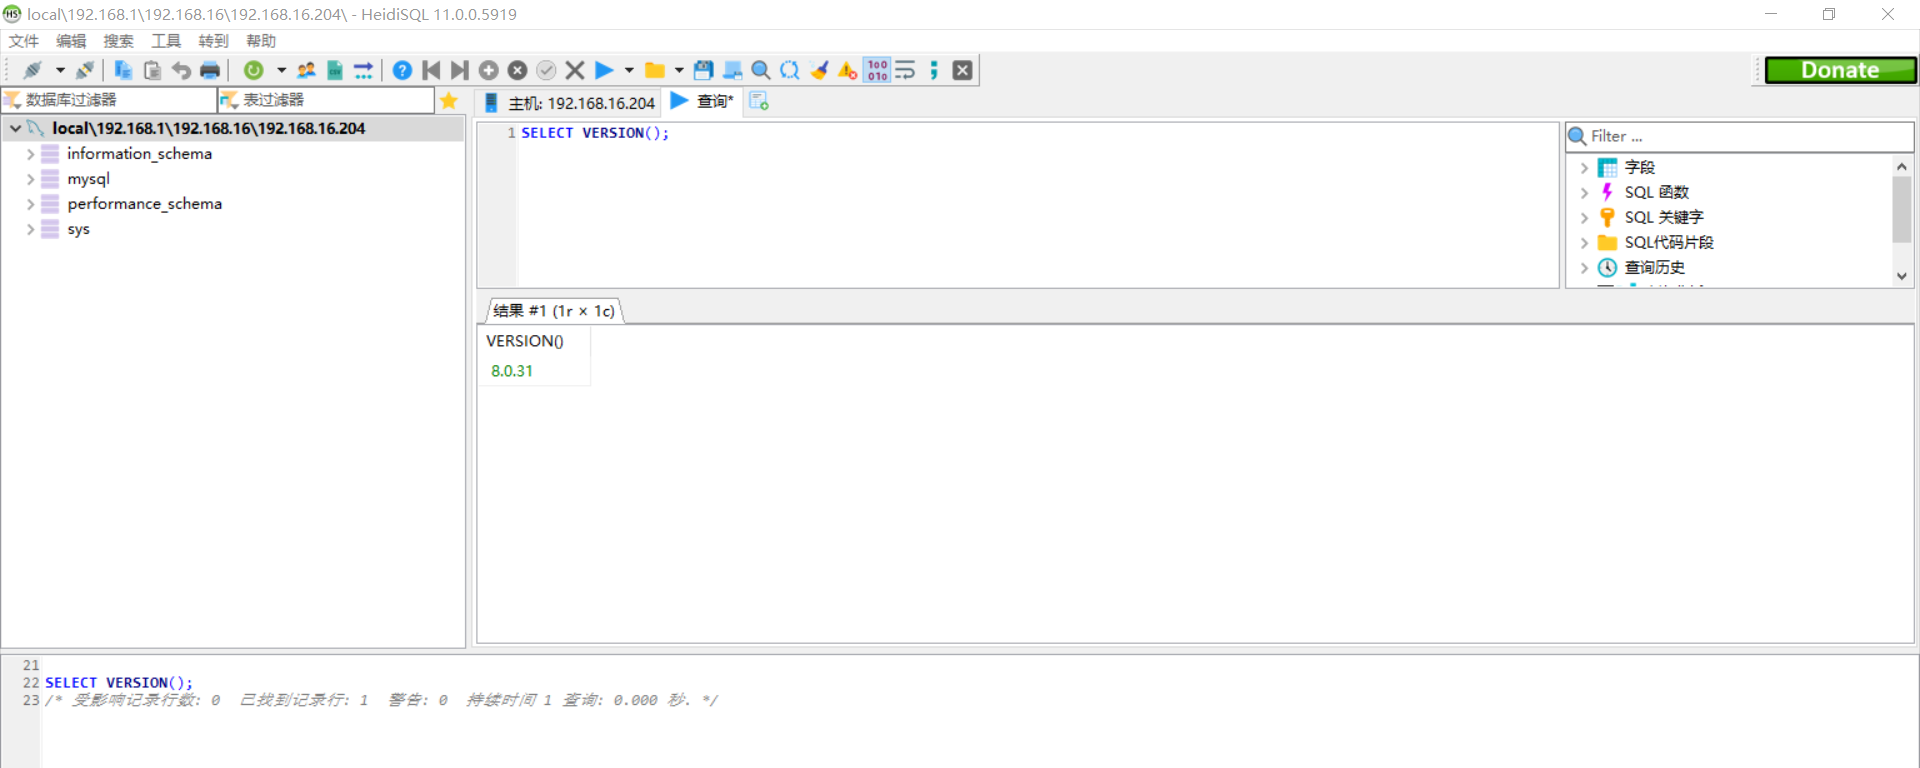
登录之后,查看效果。易知,当前最新版本的mysql,其版本为8.0.31。
九、出现问题
9.1 failure: repodata/repomd.xml from kubernetes: [Errno 256] No more mirrors to try
在执行 1.4 安装kubeadm、kubelet 和 kubectl (ALL) 过程中,出现错误信息。
https://mirrors.aliyun.com/kubernetes/yum/repos/kubernetes-el7-x86_64/repodata/repomd.xml: [Errno -1] repomd.xml signature could not be verified for kubernetes
正在尝试其它镜像。


 One of the configured repositories failed (Kubernetes),
 and yum doesn't have enough cached data to continue. At this point the only
 safe thing yum can do is fail. There are a few ways to work "fix" this:

     1. Contact the upstream for the repository and get them to fix the problem.

     2. Reconfigure the baseurl/etc. for the repository, to point to a working
        upstream. This is most often useful if you are using a newer
        distribution release than is supported by the repository (and the
        packages for the previous distribution release still work).

     3. Run the command with the repository temporarily disabled
            yum --disablerepo=kubernetes ...

     4. Disable the repository permanently, so yum won't use it by default. Yum
        will then just ignore the repository until you permanently enable it
        again or use --enablerepo for temporary usage:

            yum-config-manager --disable kubernetes
        or
            subscription-manager repos --disable=kubernetes

     5. Configure the failing repository to be skipped, if it is unavailable.
        Note that yum will try to contact the repo. when it runs most commands,
        so will have to try and fail each time (and thus. yum will be be much
        slower). If it is a very temporary problem though, this is often a nice
        compromise:

            yum-config-manager --save --setopt=kubernetes.skip_if_unavailable=true

failure: repodata/repomd.xml from kubernetes: [Errno 256] No more mirrors to try.
https://mirrors.aliyun.com/kubernetes/yum/repos/kubernetes-el7-x86_64/repodata/repomd.xml: [Errno -1] repomd.xml signature could not be verified for kubernetes
出现问题的原因,是进行了一些特定的检查导致,这里我们将对应的检查禁用。把gpgcheck和repo_gpgcheck都赋值为0。
[kubernetes]
name=Kubernetes
baseurl=https://mirrors.aliyun.com/kubernetes/yum/repos/kubernetes-el7-x86_64/
enabled=1
gpgcheck=0
repo_gpgcheck=0
gpgkey=https://mirrors.aliyun.com/kubernetes/yum/doc/yum-key.gpg https://mirrors.aliyun.com/kubernetes/yum/doc/rpm-package-key.gpg
重新加载仓库缓存再安装。
yum makecache fast
9.2 [WARNING Swap]: swap is enabled; production deployments should disable swap unless testing the NodeSwap feature gate of the kubelet
初始化平面节点,过程中,出现下列问题。
[WARNING Swap]: swap is enabled; production deployments should disable swap unless testing the NodeSwap feature gate of the kubelet
error execution phase preflight: [preflight] Some fatal errors occurred:
        [ERROR KubeletVersion]: the kubelet version is higher than the control plane version. This is not a supported version skew and may lead to a malfunctional cluster. Kubelet version: "1.25.3" Control plane version: "1.24.0"
[preflight] If you know what you are doing, you can make a check non-fatal with `--ignore-preflight-errors=...`
To see the stack trace of this error execute with --v=5 or higher
解决方案即禁用swap。
详见[1.2.6 禁用 swap (ALL)](#1.2.6-禁用 swap (ALL))。
9.3 “command failed” err=”failed to load kubelet config file, error: failed to load Kubelet config file /var/lib/kubelet/config.yaml, error failed to read kubelet config file “/var/lib/kubelet/config.yaml”, error: open /var/lib/kubelet/config.yaml: no such file or directory
11月 09 16:00:41 centos206 kubelet[1440]: E1109 16:00:41.791342    1440 run.go:74] "command failed" err="failed to load kubelet config file, error: failed to load Kubelet config file /var/lib/kubelet/config.yaml, error failed to read kubelet config file "/var/lib/kubelet/config.yaml", error: open /var/lib/kubelet/config.yaml: no such file or directory
11月 09 16:00:41 centos206 systemd[1]: kubelet.service: main process exited, code=exited, status=1/FAILURE
11月 09 16:00:41 centos206 systemd[1]: Unit kubelet.service entered failed state.
11月 09 16:00:41 centos206 systemd[1]: kubelet.service failed.
11月 09 16:00:51 centos206 systemd[1]: kubelet.service holdoff time over, scheduling restart.
11月 09 16:00:51 centos206 systemd[1]: Stopped kubelet: The Kubernetes Node Agent.
-- Subject: Unit kubelet.service has finished shutting down
-- Defined-By: systemd
-- Support: http://lists.freedesktop.org/mailman/listinfo/systemd-devel
--
-- Unit kubelet.service has finished shutting down.
11月 09 16:00:51 centos206 systemd[1]: Started kubelet: The Kubernetes Node Agent.
-- Subject: Unit kubelet.service has finished start-up
-- Defined-By: systemd
-- Support: http://lists.freedesktop.org/mailman/listinfo/systemd-devel
--
-- Unit kubelet.service has finished starting up.
--
-- The start-up result is done.
解决方法:
rm -rf /etc/containerd/config.toml
systemctl restart containerd
9.4 remote_runtime.go:222] “RunPodSandbox from runtime service failed” err=”rpc error: code = Unknown desc = failed to get sandbox image “registry.k8s.io/pause:3.6”: failed to pull image “registry.k8s.io/pause:3.6”
通过执行命令journalctl -xeu kubelet可以查看到启动失败的信息。
11月 09 16:12:29 centos204 kubelet[1018]: E1109 16:12:29.346787    1018 remote_runtime.go:222] "RunPodSandbox from runtime service failed" err="rpc error: code = Unknown desc = failed to get sandbox image \"registry.k8s.io/pause:3.6\": failed to pull image \"registry.k8s.io/pause:3.6\": failed to pull and unpack image \"registry.k8s.io/pause:3.6\": failed to resolve reference \"registry.k8s.io/pause:3.6\": failed to do request: Head \"https://asia-east1-docker.pkg.dev/v2/k8s-artifacts-prod/images/pause/manifests/3.6\": dial tcp 74.125.203.82:443: i/o timeout"
11月 09 16:12:29 centos204 kubelet[1018]: E1109 16:12:29.346834    1018 kuberuntime_sandbox.go:71] "Failed to create sandbox for pod" err="rpc error: code = Unknown desc = failed to get sandbox image \"registry.k8s.io/pause:3.6\": failed to pull image \"registry.k8s.io/pause:3.6\": failed to pull and unpack image \"registry.k8s.io/pause:3.6\": failed to resolve reference \"registry.k8s.io/pause:3.6\": failed to do request: Head \"https://asia-east1-docker.pkg.dev/v2/k8s-artifacts-prod/images/pause/manifests/3.6\": dial tcp 74.125.203.82:443: i/o timeout" pod="kube-system/kube-apiserver-centos204"
11月 09 16:12:29 centos204 kubelet[1018]: E1109 16:12:29.346867    1018 kuberuntime_manager.go:772] "CreatePodSandbox for pod failed" err="rpc error: code = Unknown desc = failed to get sandbox image \"registry.k8s.io/pause:3.6\": failed to pull image \"registry.k8s.io/pause:3.6\": failed to pull and unpack image \"registry.k8s.io/pause:3.6\": failed to resolve reference \"registry.k8s.io/pause:3.6\": failed to do request: Head \"https://asia-east1-docker.pkg.dev/v2/k8s-artifacts-prod/images/pause/manifests/3.6\": dial tcp 74.125.203.82:443: i/o timeout" pod="kube-system/kube-apiserver-centos204"
11月 09 16:12:29 centos204 kubelet[1018]: E1109 16:12:29.346938    1018 pod_workers.go:965] "Error syncing pod, skipping" err="failed to \"CreatePodSandbox\" for \"kube-apiserver-centos204_kube-system(9d0e1d0b02980c2d79c8f18fda3eec25)\" with CreatePodSandboxError: \"Failed to create sandbox for pod \\\"kube-apiserver-centos204_kube-system(9d0e1d0b02980c2d79c8f18fda3eec25)\\\": rpc error: code = Unknown desc = failed to get sandbox image \\\"registry.k8s.io/pause:3.6\\\": failed to pull image \\\"registry.k8s.io/pause:3.6\\\": failed to pull and unpack image \\\"registry.k8s.io/pause:3.6\\\": failed to resolve reference \\\"registry.k8s.io/pause:3.6\\\": failed to do request: Head \\\"https://asia-east1-docker.pkg.dev/v2/k8s-artifacts-prod/images/pause/manifests/3.6\\\": dial tcp 74.125.203.82:443: i/o timeout\"" pod="kube-system/kube-apiserver-centos204" podUID=9d0e1d0b02980c2d79c8f18fda3eec25
这里可以明显看到,是找不到registry.k8s.io/pause:3.6镜像文件导致。
解决方案即,使用containerd将对应的镜像文件下载到本地,并将文件命名为registry.k8s.io/pause:3.6。
ctr -n k8s.io image pull registry.aliyuncs.com/google_containers/pause:3.6
ctr -n k8s.io image tag registry.aliyuncs.com/google_containers/pause:3.6 registry.k8s.io/pause:3.6
9.5 unmounted volumes=[bpffs], unattached volumes=[var-lib-calico lib-modules bpffs cni-net-dir sys-fs xtables-lock host-local-net-dir cni-bin-dir policysync cni-log-dir var-run-calico kube-api-access-qzpxq nodeproc
 Jul 25 00:01:36 localhost kubelet: E0725 00:01:36.194222    9225 kubelet.go:1709] "Unable to attach or mount volumes for pod; skipping pod" err="unmounted volumes=[bpffs], unattached volumes=[var-lib-calico lib-modules bpffs cni-net-dir sys-fs xtables-lock host-local-net-dir cni-bin-dir policysync cni-log-dir var-run-calico kube-api-access-qzpxq nodeproc]: timed out waiting for the condition" pod="kube-system/calico-node-t2j8v"
Jul 25 00:01:36 localhost kubelet: E0725 00:01:36.194309    9225 pod_workers.go:951] "Error syncing pod, skipping" err="unmounted volumes=[bpffs], unattached volumes=[var-lib-calico lib-modules bpffs cni-net-dir sys-fs xtables-lock host-local-net-dir cni-bin-dir policysync cni-log-dir var-run-calico kube-api-access-qzpxq nodeproc]: timed out waiting for the condition" pod="kube-system/calico-node-t2j8v" podUID=f4d73d76-f5d8-4f83-bea2-f89c456f25c6
缺少相关的依赖包。
yum install nfs-common nfs-utils bpftools -y
9.6 “getting status of runtime: rpc error: code = Unimplemented desc = unknown service runtime.v1alpha2.RuntimeService”
初始化平面节点过程中会出现该问题。
rror execution phase preflight: [preflight] Some fatal errors occurred:
        [ERROR CRI]: container runtime is not running: output: E1110 09:21:03.828618    4572 remote_runtime.go:948] "Status from runtime service failed" err="rpc error: code = Unimplemented desc = unknown service runtime.v1alpha2.RuntimeService"
time="2022-11-10T09:21:03+08:00" level=fatal msg="getting status of runtime: rpc error: code = Unimplemented desc = unknown service runtime.v1alpha2.RuntimeService"
解决方法,删除配置并重启containerd。
rm -rf /etc/containerd/config.toml
systemctl restart containerd
9.7 “Container runtime network not ready” networkReady=”NetworkReady=false reason:NetworkPluginNotReady message:Network plugin returns error: cni plugin not initialized”
这是没有安装网络插件,我们这里选择安装Calico。
详见 2.1.3 安装网络附加组件。
9.8 “Status from runtime service failed” err=”rpc error: code = Unimplemented desc = unknown service runtime.v1alpha2.RuntimeService”
执行节点加入的时候,报错:
error execution phase preflight: [preflight] Some fatal errors occurred:
        [ERROR CRI]: container runtime is not running: output: E1114 19:51:04.052757   24430 remote_runtime.go:948] "Status from runtime service failed" err="rpc error: code = Unimplemented desc = unknown service runtime.v1alpha2.RuntimeService"
time="2022-11-14T19:51:04+08:00" level=fatal msg="getting status of runtime: rpc error: code = Unimplemented desc = unknown service runtime.v1alpha2.RuntimeService"
, error: exit status 1
解决方案:
rm -rf /etc/containerd/config.toml
systemctl restart containerd
9.9 error execution phase preflight: couldn’t validate the identity of the API Server: abort connecting to API servers after timeout of 5m0s
在加入节点时出错。
[preflight] Running pre-flight checks
error execution phase preflight: couldn't validate the identity of the API Server: could not find a JWS signature in the cluster-info ConfigMap for token ID "iv0wk6"
To see the stack trace of this error execute with --v=5 or higher
出现的原因是,令牌token过期,需要重新生成令牌token。
kubeadm token create --print-join-command
9.10 [ERROR FileAvailable–etc-kubernetes-kubelet.conf]: /etc/kubernetes/kubelet.conf already exists
移除节点后,再次加入节点时,报错。
[preflight] Running pre-flight checks
error execution phase preflight: [preflight] Some fatal errors occurred:
        [ERROR FileAvailable--etc-kubernetes-kubelet.conf]: /etc/kubernetes/kubelet.conf already exists
        [ERROR Port-10250]: Port 10250 is in use
        [ERROR FileAvailable--etc-kubernetes-pki-ca.crt]: /etc/kubernetes/pki/ca.crt already exists
[preflight] If you know what you are doing, you can make a check non-fatal with `--ignore-preflight-errors=...`
To see the stack trace of this error execute with --v=5 or higher
解决方法:
在当前节点,将之前的信息重置,再加入。
kubeadm reset
参考文章
原文地址:http://www.cnblogs.com/lunyu/p/16906036.html