
原文:How to Set up Python and Visual Studio Code IDE for Data Science – One Zero Blog
Setting up Python and running it smoothly on your PC is essential for data analytics or computational work. With advancements in open-source package managers, it has become simple and straightforward. In this tutorial, we will go through the whole process from downloading to installing Python and setting a custom environment for personal projects.
The entire process involved downloading Miniconda (python library manager) and Visual Studio Code, installing them, and creating an environment for managing and handling project libraries.
Why Miniconda?
Because it is small in size, easy to download, and only contains required libraries and dependencies which require minimum installation time.
Why Visual Studio Code?
Because VS Code is one of the best integrated development environment (IDE) with awesome look and up-to-date functionalities used by millions of developers worldwide. It is maintained by Microsoft and absolutely free to use.
Article Outline
- Downloading and installing Miniconda
- Downloading and installing Visual Studio Code
- Setting up a new environment
- Check for code execution
Let’s start with the set-up process.
1. Downloading and Installing Miniconda
Step 1.1: The very first step is to download the Miniconda. Miniconda is the smaller installer version of the Conda. It includes only conda, Python, the packages they depend on, and a small number of other useful packages, including pip, zlib and a few others.
Use the following link to download the Miniconda. Download the version that includes Python 3.8 or above based on your operating system and its configuration (32 bit or 64 bit).
URL for Miniconda download link
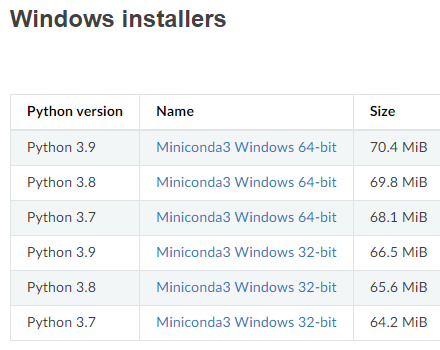 Miniconda versions.
Step 1.2: Once the downloading is complete, then start the installation process. It will first show the welcome page.
Click “Next >” button.
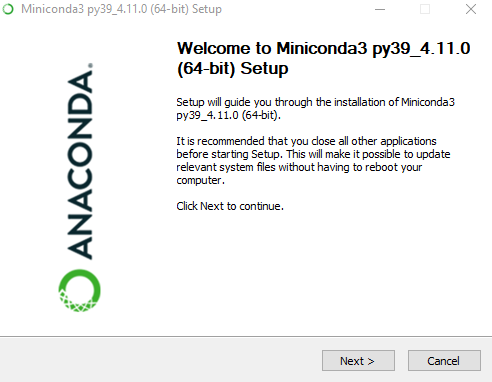 Welcome page.
Step 1.3: The next step is to accept the license agreement by clicking “I Agree”.
 License Agreement.
Step 1.4: Once you accept the license agreement, then you need to select the installation type. For personal use, select “Just Me” and click “Next >”
 Installation Type.
Step 1.5: In the next step, select the directory where you would like to install Miniconda. If your default location has enough memory, then proceed with that directory.
 Installation directory.
Step 1.6: Next we need to set the following:
- Setting path variable: tick the “add Miniconda to my PATH environment variable”.
- Next tick the “Register Miniconda3 as my default Python 3.9″. It will set the Anaconda as the primary Python 3.9 on the system. We can change it later during customized Miniconda environment setup.
 Path variable and default Python 3.9.
Step 1.7: Click the install button to start the Miniconda installation in your PC.
 Installation is in process.
Step 1.8: Once the installation is done, it will show the “Installation Complete” on top of the installation page.
Click “Next >” to finish the installation process.
 Installation complete page.
To finish the process, uncheck the following boxes (as they are not that much important) and click “finish”.
 Finish page.
2. Downloading and Installing VS Code
Once the Miniconda installation is complete, you can proceed with the Visual Studio Code installation.
Step 2.1: First, visit the following website to download the desired version of the VS Code.
URL for VS Code download link
Here, in this blog, I will go with Windows 64 bit version. You can proceed with Windows/Linux/Mac, whichever your preferred operating system. The process is almost similar.
 VSCode download page.
Step 2.2: Once you start the installation, it will first ask you to accept the license agreement.
After accepting the license agreement, click “Next >” to proceed to the next page.
 VSCode license agreement.
Step 2.3: In the next step, select the directory where you would like to install VS Code. If your default location has enough memory, then proceed with that directory.
 Installation directory selection.
Step 2.4: In this page, it will inform you that it will create a shortcut in the Start Menu Folder.
Click “Next>” and proceed to the next page.
 VSCode shortcut.
Step 2.5: Next tick the following boxes as illustrated in the image below.
Thereafter, proceed with “Next>”.
 Adding icon and setting PATH variable.
Step 2.6: In this page, it will inform us that the application is now ready to begin installation in your computer with all desired settings that we have selected initially.
Proceed with “install” to begin the installation process.
 Final installation page.
Here, is a screenshot of the installation process.
 Snapshot of Installation process.
Step 2.7: Now we have reached the final page, which is showing that the installation process is complete. We can now click the finish button to launch VS Code IDE.
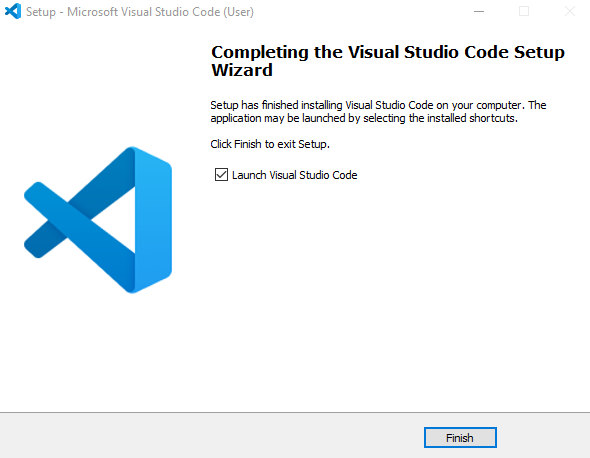 Final/Finish page.
This is what VS Code home page looks like.
 VSCode home page.
Step 2.8: To run the python in VS Code smoothly, we need to install the Python extension provided by Microsoft. It offers IntelliSense (Pylance), linting, debugging, code navigation, code formatting, refactoring, variable explorer, test explorer and more!
To install it:
- First click the four dots menu on the left side called “Extensions”.
- Then type Python in the search bar (it requires internet connection).
- Look for the Python by Microsoft.
- Click it and look on the right side for install button.
- Click on the install button.
 Python Microsoft Extension page.
Here is a screenshot of the extension page after installation.
 Extension page after installation.
Step 2.9: Next, click on the “Explorer” located on the left side menu (top one).
- Next press Ctrl + Shift + P, it will open the Command Palette. The command palette is the option menu from where any functionality of VS Code can be set or altered.
- Next, type in the search “Select Interpreter”. Once it shows the option, click on it and wait for a few seconds.
 Looking for Python interpreter.
After waiting for a few seconds, it will show all the available Python interpreters. Here in the below image it is showing the Python 3.9.7 as base interpreter. This is the default that was installed with the Miniconda, and we could utilize it to run Python codes.
But occasionally, we need to create a separate environment for running Python, especially for a group project. Here comes the part called Python environment.
 Python base interpreter (Python version 3.9.7)
3. New Environment Set-up
Now, you might be curious why we want a separate Python environment?
Because we need it for managing Python packages for different projects. Python environment allows us to avoid installing Python packages globally, which could break system tools or other projects.
Now let’s begin the environment set-up.
Step 3.1: First go to windows menu and look for “Anaconda Prompt (miniconda 3).
Click it to open it in a separate window.
 Looking for Anaconda prompt.
Once you open it, it looks like the following, where
- (base) indicates that we are now in base environment (under Miniconda)
 Base environment.
Step 3.2: As we want to create a new environment to manage all our libraries.
Let’s create a new environment.
To create a new environment, we need to run the following code, where you have to enter your environment name in place of “yourenvname”. Our base environment was Python 3.9.7 (base). But let’s assume that we specially need the Python version 3.8 for our new environment. So, at the end of the comment, we will add the Python version “python=3.8”.
conda create --name yourenvname python=3.8Say, for example, I would like to name my new virtual environment as “datascience” and want python 3.8 as my default python version. To execute and create a virtual environment with the above stated configurations, we need to run just the following code in the command prompt.
conda create --name datascience python=3.8 Creating a new environment, “datascience” with Python 3.8.
Once you press enter and execute the code, it will prompt you to install various default packages (dependencies) under the new environment.
- Type “y” which means “yes” and press enter. Wait until the installation is done.
 Package installation while creating new environment.
After the installation, you can check different environments available under Miniconda.
- Type “conda env list”
It will print the existing environment names. You can see that there are two environments. The base and our newly created environment, datascience.
conda env list Printing environment list.
Step 3.3: Now we are ready with our new conda environment called “datascience”. Before we use this environment to run code in VS Code, we need to install some basic libraries/packages inside our “datascience” environment.
To install packages inside our datascience environment, we need to first activate it.
Just type “conda activate datascience” without any quote in the command prompt. Now you can observe that environment name datascience is inside the parenthesis (datascience) instead of base environment (base). It indicates that our new environment “datascience” is activated.
conda activate datascience Activating datascience environment.
Step 3.4: As the datascience environment is now activated, we can install different packages inside this environment that we are going to utilize for data analysis.
To install any package (that are available under anaconda repositories/servers holding libraries), we need to run the following code, where replace the “library_name” with real library name.
conda install library_nameFirst, we need to install the ipykernel library so that we could run the Jupyter notebook inside VS Code using the following command.
conda install ipykernel Installing ipykernel.
Similarly, we need to install pandas (for data wrangling), matplotlib, seaborn and plotly (for plotting/data visualization).
conda install ipykernel
conda install pandas
conda install matplotlib
conda install seaborn
conda install plotly
Here is a snapshot of pandas installation.
 pandas library installation.
Note: While installing libraries, it may ask you to install additional dependencies (upon which the current library depends). If it shows different library names (which will be installed) and displays “y/n” then press ‘y” means “yes’ install all dependencies. Afterward, just wait until all dependencies are installed in the activated “datascience” envirobnment.
Step 3.5: Next open the VS Code and enter Ctrl + Shift + p to open the command palette. Type “Select Interpreter” and click on it and wait for a few seconds.
 Searching for available interpreters.
Now, it will show all the available interpreters. You can observe that it is showing Python 3.9.7 (base: conda) and our newly created environment Python 3.8.13 (datascience: conda).
- Select the Python 3.8.13 (datascience: conda) as we are going to set it as the default environment for our current work or project.
 Available environments.
Step 3.6: Next, we will create a new Jupyter Notebook so that we can test that our code runs in the newly created environment.
What is a Jupyter Notebook?
Jupyter notebook is a web like application which used by research scholars, data engineer, data analyst, machine learning scientist, scientific researchers or a general user who wants to do any sort of scientific computation, data processing or visualization related work.
- To create a new Jupyter notebook (also known as IPython Notebook) just open the command palette (Ctrl + Shift + p) and type “New Jupyter Notebook” without any quotation, and click it to create a new notebook.
Creating a Jupyter Notebook.
Here, the below snapshot shows a blank Jupyter Notebook with empty cell.
 New Jupyter Notebook
Step 3.7: First, we will check whether the datascience environment is working fine or not.
- Type 1+1 in the cell and run by pressing the “triangular arrow” button on the left side of the cell. You can also run the cell by Ctrl + Enter. If it produces an answer of 2, then it is working well.
- Next, let’s check whether the libraries we properly installed under the datascience environment. First we need to create a new cell where we test the libraries. To generate a new cell, just press Ctrl +Shift + b where b indicates below (or click the + Code tab). Now we will import the pandas library in the current Jupyter Notebook session. Type “import pandas as pd” without any quotation in the new cell, then run the cell. If it runs without producing any error, then our environment is working fine.
 Running code using new environment.
Now our environment is ready, and we can use it to run codes and perform data analysis.
Note: You can create unlimited environments based on your project requirements.
I hope you learned something new!
原文地址:http://www.cnblogs.com/panpanwelcome/p/16909701.html