
资料来源
代码部分
%matplotlib inline
import torch
from IPython import display
from matplotlib import pyplot as plt
import numpy as np
import random
num_inputs = 2
num_examples = 1000
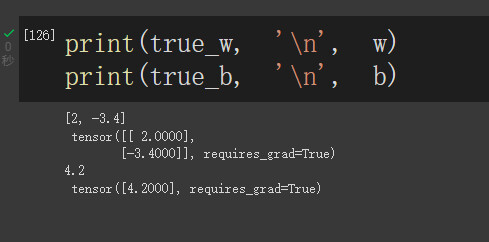
true_w = [2, -3.4]
true_b = 4.2
# 创建一个随机1000样本,每个样本2个特征
features = torch.randn(num_examples, num_inputs,
dtype=torch.float32)
labels = true_w[0] * features[:, 0] + true_w[1] * features[:, 1] + true_b
labels += torch.tensor(np.random.normal(0, 0.01, size=labels.size()),
dtype=torch.float32)
# 这里得到的label是1000*1的矩阵
print(labels.shape)
def use_svg_display():
# 用矢量图显示
display.set_matplotlib_formats('svg')
def set_figsize(figsize=(5.5, 5.5)):
use_svg_display()
# 设置图的尺寸
plt.rcParams['figure.figsize'] = figsize
# # 在../d2lzh_pytorch里面添加上面两个函数后就可以这样导入
# import sys
# sys.path.append("..")
# from d2lzh_pytorch import *
set_figsize()
plt.scatter(features[:, 0].numpy(), labels.numpy(), 5);
plt.scatter(features[:, 1].numpy(), labels.numpy(), 1);
# plt.scatter(np.arange(1000), features[:, 0].numpy(),5)
# plt.scatter(np.arange(1000), features[:, 1].numpy(),1)
# plt.scatter(np.arange(1000), labels.numpy(),3)
# 横轴是特征值一个权重,纵轴是标签值结果值
# 本函数已保存在d2lzh包中方便以后使用
def data_iter(batch_size, features, labels):
num_examples = len(features)
indices = list(range(num_examples))
random.shuffle(indices) # 样本的读取顺序是随机的
for i in range(0, num_examples, batch_size):
j = torch.LongTensor(indices[i: min(i + batch_size, num_examples)]) # 最后一次可能不足一个batch
yield features.index_select(0, j), labels.index_select(0, j)
batch_size = 5
for X, y in data_iter(batch_size, features, labels):
print(X,'\n', y)
break
w = torch.tensor(np.random.normal(0, 0.01, (num_inputs, 1)), dtype=torch.float32, requires_grad=True)
b = torch.zeros(1, dtype=torch.float32, requires_grad=True)
print(w.requires_grad)
print(b.requires_grad)
def linreg(X, w, b): # 本函数已保存在d2lzh_pytorch包中方便以后使用
return torch.mm(X, w) + b
def squared_loss(y_hat, y): # 本函数已保存在d2lzh_pytorch包中方便以后使用
# 注意这里返回的是向量, 另外, pytorch里的MSELoss并没有除以 2
return (y_hat - y.view(y_hat.size())) ** 2 / 2
def sgd(params, lr, batch_size): # 本函数已保存在d2lzh_pytorch包中方便以后使用
for param in params:
print("param.data", param.data)
param.data -= lr * param.grad / batch_size # 注意这里更改param时用的param.data
主要是为了理解这段代码
lr = 0.03
num_epochs = 2

for epoch in range(num_epochs):  # 训练模型一共需要num_epochs个迭代周期
    # 在每一个迭代周期中,会使用训练数据集中所有样本一次(假设样本数能够被批量大小整除)。X
    # 和y分别是小批量样本的特征和标签
    for X, y in data_iter(batch_size, features, labels):
        print("X",X,"y",y)
        print("w",w,"b",b)
        l = squared_loss(linreg(X, w, b), y).sum()  # l是有关小批量X和y的损失
        print("l",l)
        l.backward() # 小批量的损失对模型参数求梯度

        sgd([w, b], lr, batch_size)  # 使用小批量随机梯度下降迭代模型参数
        print()
        # 不要忘了梯度清零
        w.grad.data.zero_()
        b.grad.data.zero_()
    train_l = loss(net(features, w, b), labels)
    print('epoch %d, loss %f' % (epoch + 1, train_l.mean().item()))
因为设定的式子为y=wx+wx+b,其中x是已知的1000×2矩阵,y是已知的1000×1矩阵
在上面生成数据集的适合,我们先设定了w1=2,w2=-3.4,b=4.2
因此我们可以算出y的值,但我们如果这么做的话,最后得到的结果将会是一个确切值,如下图所示
说明标签仅由两个特征所决定,但这与我们现实是不符合的,现实中还需要很多的特征才能有对应的标签
因此我们会人为在生成数据集的时候,会给标签加上一些随机小偏差,使其结果不完全一致相等
labels += torch.tensor(np.random.normal(0, 0.01, size=labels.size()),dtype=torch.float32)
开始实验
现在对我们来说,我们收集到了三个数据,特征x1,特征x2,标签y
我们现在建立一个模型,我们认为模型是线性的,设计为y=wx+wx+b
这里就产生了三个未知量,w1,w2,b
因为X是1000×2的矩阵,y是1000×1的矩阵,所以权重矩阵w是2×1
因为[1000,2]x[2,1]=[1000,1],偏置b为常量
但开始计算前,我们仍然可以赋予w和b一个初始值,令其不断向着想要的模型前进
这就需要学习率lr,但学习率并不是越高越好,这在之前已经讲过
torch.mm(X, w) + b
这个函数返回的是矩阵相乘的结果,主要用于正向传播
def linreg(X, w, b):  # 本函数已保存在d2lzh_pytorch包中方便以后使用
    return torch.mm(X, w) + b
修改linreg函数和计算损失的函数
def linreg(X, w, b):  # 本函数已保存在d2lzh_pytorch包中方便以后使用
    temp = torch.mm(X, w) + b
    # return torch.mm(X, w) + b
    print("tempx",X)
    print("tempw",w)
    print("tempb",b)
    print("temp",temp)
    return temp
def squared_loss(y_hat, y):  # 本函数已保存在d2lzh_pytorch包中方便以后使用
    # 注意这里返回的是向量, 另外, pytorch里的MSELoss并没有除以 2
    print("y_hat", y_hat)
    print("y", y)
    return (y_hat - y.view(y_hat.size())) ** 2 / 2
输出一段结果,我们对这段结果展开研究
X tensor([[-0.5154, -1.4219],
        [ 1.5408,  1.2593],
        [-0.8871, -0.0814],
        [-0.3057,  0.2844],
        [-1.5921, -0.9791]]) y tensor([7.9938, 3.0068, 2.7159, 2.6196, 4.3445])
w tensor([[-0.0063],
        [ 0.0074]], requires_grad=True) b tensor([0.], requires_grad=True)
tempx tensor([[-0.5154, -1.4219],
        [ 1.5408,  1.2593],
        [-0.8871, -0.0814],
        [-0.3057,  0.2844],
        [-1.5921, -0.9791]])
tempw tensor([[-0.0063],
        [ 0.0074]], requires_grad=True)
tempb tensor([0.], requires_grad=True)
temp tensor([[-0.0073],
        [-0.0003],
        [ 0.0049],
        [ 0.0040],
        [ 0.0027]], grad_fn=<AddBackward0>)
y_hat tensor([[-0.0073],
        [-0.0003],
        [ 0.0049],
        [ 0.0040],
        [ 0.0027]], grad_fn=<AddBackward0>)
y tensor([7.9938, 3.0068, 2.7159, 2.6196, 4.3445])
l tensor(53.0515, grad_fn=<SumBackward0>)
param.data tensor([[-0.0063],
        [ 0.0074]])
param.data tensor([0.])

X tensor([[ 1.5573, -0.0585],
        [-1.4487,  0.6507],
        [ 0.8342, -0.1456],
        [-1.3224, -0.3875],
        [ 1.0878, -0.1250]]) y tensor([ 7.5165, -0.8979,  6.3467,  2.8676,  6.7918])
w tensor([[-0.0639],
        [-0.0605]], requires_grad=True) b tensor([0.1241], requires_grad=True)
tempx tensor([[ 1.5573, -0.0585],
        [-1.4487,  0.6507],
        [ 0.8342, -0.1456],
        [-1.3224, -0.3875],
        [ 1.0878, -0.1250]])
tempw tensor([[-0.0639],
        [-0.0605]], requires_grad=True)
tempb tensor([0.1241], requires_grad=True)
temp tensor([[0.0281],
        [0.1773],
        [0.0796],
        [0.2320],
        [0.0621]], grad_fn=<AddBackward0>)
y_hat tensor([[0.0281],
        [0.1773],
        [0.0796],
        [0.2320],
        [0.0621]], grad_fn=<AddBackward0>)
y tensor([ 7.5165, -0.8979,  6.3467,  2.8676,  6.7918])
l tensor(74.3727, grad_fn=<SumBackward0>)
param.data tensor([[-0.0639],
        [-0.0605]])
param.data tensor([0.1241])
其中
tempx tensor([[-0.5154, -1.4219],
        [ 1.5408,  1.2593],
        [-0.8871, -0.0814],
        [-0.3057,  0.2844],
        [-1.5921, -0.9791]])
与
tempw tensor([[-0.0063],
        [ 0.0074]], requires_grad=True)

进行相乘,再加上此时的tempb tensor([0.], requires_grad=True),可以得到
temp tensor([[-0.0073],
        [-0.0003],
        [ 0.0049],
        [ 0.0040],
        [ 0.0027]], grad_fn=<AddBackward0>)
再将其放入损失函数中
损失函数的代码为
def squared_loss(y_hat, y):
    # 注意这里返回的是向量, 另外, pytorch里的MSELoss并没有除以 2
    print("y_hat", y_hat)
    print("y", y)
    return (y_hat - y.view(y_hat.size())) ** 2 / 2
输出的结果为
y_hat tensor([[-0.0073],
        [-0.0003],
        [ 0.0049],
        [ 0.0040],
        [ 0.0027]], grad_fn=<AddBackward0>)
y tensor([7.9938, 3.0068, 2.7159, 2.6196, 4.3445])
l tensor(53.0515, grad_fn=<SumBackward0>)
其中y_hat的结果为正向传播时得到的计算结果
y是label值,我们用计算得到的值和真实值进行计算
分别得到以下数字
32.008800605
4.521325205
3.6747605
3.42068168
9.42561362
相加得到53.05118161,也就是LOSS值
梯度下降的函数为
def sgd(params, lr, batch_size):  # 本函数已保存在d2lzh_pytorch包中方便以后使用
    for param in params:
        print("param.data", param.data)
        param.data -= lr * param.grad / batch_size

sgd([w, b], lr, batch_size)  # 使用小批量随机梯度下降迭代模型参数
得到的结果如下
param.data tensor([[-0.0063],
        [ 0.0074]])
param.data tensor([0.])
这部分的代码还是很好理解的,然后我就卡在了tensor的grad属性怎么计算
这部分就留到下期吧
原文地址:http://www.cnblogs.com/mokou/p/16914320.html
1. 本站所有资源来源于用户上传和网络,如有侵权请邮件联系站长!
2. 分享目的仅供大家学习和交流,请务用于商业用途!
3. 如果你也有好源码或者教程,可以到用户中心发布,分享有积分奖励和额外收入!
4. 本站提供的源码、模板、插件等等其他资源,都不包含技术服务请大家谅解!
5. 如有链接无法下载、失效或广告,请联系管理员处理!
6. 本站资源售价只是赞助,收取费用仅维持本站的日常运营所需!
7. 如遇到加密压缩包,默认解压密码为"gltf",如遇到无法解压的请联系管理员!
8. 因为资源和程序源码均为可复制品,所以不支持任何理由的退款兑现,请斟酌后支付下载
声明:如果标题没有注明"已测试"或者"测试可用"等字样的资源源码均未经过站长测试.特别注意没有标注的源码不保证任何可用性