
瑞吉外卖实战项目全攻略——第三天
该系列将记录一份完整的实战项目的完成过程,该篇属于第三天
案例来自B站黑马程序员Java项目实战《瑞吉外卖》,请结合课程资料阅读以下内容
该篇我们将完成以下内容:
-
公共字段自动填充
-
新添分类
-
分类信息分页查询
-
删除分类
-
修改分类
公共字段自动填充
我们的功能开发一般分为三个阶段
需求分析
前面我们已经完成了后台系统的员工系统的开发,在新增或修改员工时需要填写创建时间创建人修改时间修改人等繁杂信息
而且这些属性基本在后续的菜品,套餐中都有所体现,我们把这些字段称为公共字段,所以我们希望采用一种统一的方法来设置:
- MyBatisPlus为我们提供了公共字段自动填充的功能
我们先来简单介绍一下流程:
- 首先在我们需要修改的字段属性上添加注解:
// 属性包括有INSERT,UPDATE,INSERT_UPDATE

@TableField(fill = FieldFill.属性)
- 按照框架书写元数据对象处理器,在此类中统一为公共字段设置值,需要实现MetaObjectHandler接口
package com.qiuluo.reggie.common;

import com.baomidou.mybatisplus.core.handlers.MetaObjectHandler;
import lombok.extern.slf4j.Slf4j;
import org.apache.ibatis.reflection.MetaObject;
import org.springframework.stereotype.Component;

import java.time.LocalDateTime;

// 记得设置为配置类
@Slf4j
@Component
public class MyMetaObjectHandler implements MetaObjectHandler {

    /**
     * 添加时自动设置
     * @param metaObject
     */
    @Override
    public void insertFill(MetaObject metaObject) {

    }

    /**
     * 修改时自动设置
     * @param metaObject
     */
    @Override
    public void updateFill(MetaObject metaObject) {

    }
}
代码实现
首先我们为实体类的待修改属性添加上注解:
package com.qiuluo.reggie.domain;

import com.baomidou.mybatisplus.annotation.FieldFill;
import com.baomidou.mybatisplus.annotation.TableField;
import lombok.Data;
import java.io.Serializable;
import java.time.LocalDateTime;

@Data
public class Employee implements Serializable {

    private static final long serialVersionUID = 1L;

    private Long id;

    private String username;

    private String name;

    private String password;

    private String phone;

    private String sex;

    private String idNumber;

    private Integer status;

    @TableField(fill = FieldFill.INSERT)
    private LocalDateTime createTime;

    @TableField(fill = FieldFill.INSERT_UPDATE)
    private LocalDateTime updateTime;

    @TableField(fill = FieldFill.INSERT)
    private Long createUser;

    @TableField(fill = FieldFill.INSERT_UPDATE)
    private Long updateUser;

}
在common文件夹下创建新的MyMetaObjectHandler处理器:
package com.qiuluo.reggie.common;

import com.baomidou.mybatisplus.core.handlers.MetaObjectHandler;
import lombok.extern.slf4j.Slf4j;
import org.apache.ibatis.reflection.MetaObject;
import org.springframework.stereotype.Component;

import java.time.LocalDateTime;

@Slf4j
@Component
public class MyMetaObjectHandler implements MetaObjectHandler {

    /**
     * 添加时自动设置
     * @param metaObject
     */
    @Override
    public void insertFill(MetaObject metaObject) {
        log.info("修改元数据");
        // 我们可以在这里统一设置公共字段的值
        metaObject.setValue("createTime", LocalDateTime.now());
        metaObject.setValue("updateTime", LocalDateTime.now());
        // 但是关于修改或创建人我们无法设置,因为我们无法得知目前是谁修改,这里暂时用Long(1)代替
        metaObject.setValue("createUser", new Long(1));
        metaObject.setValue("updateUser", new Long(1));
    }

    /**
     * 修改时自动设置
     * @param metaObject
     */
    @Override
    public void updateFill(MetaObject metaObject) {
        metaObject.setValue("updateTime", LocalDateTime.now());
        metaObject.setValue("updateUser", new Long(1));
    }
}
之后,再将我们的服务层中相关设置属性代码去掉即可
功能完善
在上面我们已经完成基本的公共字段的设置,但是我们会注意到我们无法设置相关人的信息
因为我们在之前的服务层中采用Request来获得当前Session下的保存的员工id,但目前我们无法获得Request
但是我们可以采用线程的单一性来获得当前线程下存储的内容
每次客户端发送的每次http请求,对应的服务器都会分配一个新的线程来处理,在处理过程中设计到下面类方法都属于一个相同的线程:
- LoginCheckFilter的doFilter方法
- EmployeeController的update方法
- MyMetaObjectHandler的updateFill方法
验证方法可以采用获得并比较当前线程:
// 通过该方法获得当前线程的id
long id = Thread.currentThread().getId();
// 以日志的形式输出即可
log.info("当前线程id:" + id);
正常情况下我们会得到三个线程相同的id
那么我们就可以利用线程相同的原理,在当前线程中直接存储id,再在MyMetaObjectHandler中获得id
我们主要采用ThreadLocal,我们简单介绍一下ThreadLocal:
- ThreadLocal并不是一-个Thread,而是Thread的局部变量。
- 当使用ThreadLocal维护变量时,每个使用该变量的线程具有独立的变量副本。
- 每一个线程都可以独立地改变自己的副本,而不会影响其它线程所对应的副本。
- ThreadLocal为每个线程提供单独一份存储空间,具有线程隔离的效果,只有在线程内才能获取到对应的值,线程外则不能访问。
其中Thread Local主要只有两个方法:
// 设置当前线程的线程局部变量的值
public void set(T value);
// 返回当前线程所对应的局部变量的值
public T get();
下面我们演示相关步骤:
- 设置一个工具类,用于使用当前线程的方法
package com.qiuluo.reggie.common;

/**
 * 基于ThreadLocal的工具类,用于保存用户id
 */
public class BaseContext {
    // 设置一个ThreadLocal,存储Long型(id)
    private static ThreadLocal<Long> threadLocal = new ThreadLocal<>();

    // 存储方法,调用set
    public static void setCurrentId(Long id){
        threadLocal.set(id);
    }

    // 获得方法,调用get
    public static Long getCurrentId(){
        return threadLocal.get();
    }
}
- 在LoginCheckFilter的doFilter中获得用户id,并set储存
package com.qiuluo.reggie.filter;

import com.alibaba.fastjson.JSON;
import com.qiuluo.reggie.common.BaseContext;
import com.qiuluo.reggie.common.Result;
import lombok.extern.slf4j.Slf4j;
import org.springframework.util.AntPathMatcher;

import javax.servlet.*;
import javax.servlet.annotation.WebFilter;
import javax.servlet.http.HttpServletRequest;
import javax.servlet.http.HttpServletResponse;
import java.io.IOException;

/**
 * 检查用户是否已经完成登录
 */
@WebFilter(filterName = "loginCheckFilter",urlPatterns = "/*")
@Slf4j
public class LoginCheckFilter implements Filter{

    public static final AntPathMatcher PATH_MATCHER = new AntPathMatcher();

    @Override
    public void doFilter(ServletRequest servletRequest, ServletResponse servletResponse, FilterChain filterChain) throws IOException, ServletException {
        HttpServletRequest request = (HttpServletRequest) servletRequest;
        HttpServletResponse response = (HttpServletResponse) servletResponse;

        String requestURI = request.getRequestURI();

        log.info("拦截到请求:{}",requestURI);

        String[] urls = new String[]{
                "/employee/login",
                "/employee/logout",
                "/backend/**",
                "/front/**"
        };

        boolean check = check(urls, requestURI);

        if(check){
            log.info("本次请求{}不需要处理",requestURI);
            filterChain.doFilter(request,response);
            return;
        }

        if(request.getSession().getAttribute("employee") != null){
            log.info("用户已登录,用户id为:{}",request.getSession().getAttribute("employee"));

            log.info("线程id" + Thread.currentThread().getId());

            // 注意这里:我们直接使用工具类的方法来设置线程局部变量
            Long empId = (Long) request.getSession().getAttribute("employee");
            BaseContext.setCurrentId(empId);

            filterChain.doFilter(request,response);
            return;
        }

        log.info("用户未登录");
        response.getWriter().write(JSON.toJSONString(Result.error("NOTLOGIN")));
        return;

    }
    public boolean check(String[] urls,String requestURI){
        for (String url : urls) {
            boolean match = PATH_MATCHER.match(url, requestURI);
            if(match){
                return true;
            }
        }
        return false;
    }
}
- 在MyMetaObjectHandler的updateFill方法中获得用户id,并加载进相关属性
package com.qiuluo.reggie.common;

import com.baomidou.mybatisplus.core.handlers.MetaObjectHandler;
import lombok.extern.slf4j.Slf4j;
import org.apache.ibatis.reflection.MetaObject;
import org.springframework.stereotype.Component;

import java.time.LocalDateTime;

@Slf4j
@Component
public class MyMetaObjectHandler implements MetaObjectHandler {

    /**
     * 添加时自动设置
     * @param metaObject
     */
    @Override
    public void insertFill(MetaObject metaObject) {
        log.info("修改元数据");
        log.info("线程id" + Thread.currentThread().getId());
        metaObject.setValue("createTime", LocalDateTime.now());
        metaObject.setValue("updateTime", LocalDateTime.now());
        // 我们调用工具类方法来使用ThreadLocal获得当前id并赋值
        metaObject.setValue("createUser", BaseContext.getCurrentId());
        metaObject.setValue("updateUser", BaseContext.getCurrentId());
    }

    /**
     * 修改时自动设置
     * @param metaObject
     */
    @Override
    public void updateFill(MetaObject metaObject) {
        metaObject.setValue("updateTime", LocalDateTime.now());
        metaObject.setValue("updateUser", BaseContext.getCurrentId());
    }
}
实际测试
测试方法很简单,我们直接在主页中点击新建或修改方法,到数据库内部查看修改时间或修改人即可
新增分类
我们的功能开发一般分为三个阶段
需求分析
根据需求,我们需要设置分类管理信息
分类信息存放在一张表中,分为为菜品分类和套餐分类,我们用数据库的type属性来区分两种分类
我们来到前端,分别点击菜品分类和套餐分类的创建,F12查看传输数据就会发现:

点击菜品分类,这里不仅传输了我们页面书写的name和sort,还额外传递了type属性表示是菜品分类
因而我们只需要将数据传入即可,不用分心设置是菜品分类还是套餐分类,直接书写代码即可
代码实现
因为是新的实体类,我们需要重新构造一系列domain,mapper等内容
- 实体类
package com.qiuluo.reggie.domain;

import com.baomidou.mybatisplus.annotation.FieldFill;
import com.baomidou.mybatisplus.annotation.IdType;
import com.baomidou.mybatisplus.annotation.TableField;
import com.baomidou.mybatisplus.annotation.TableId;
import lombok.Data;
import lombok.Getter;
import lombok.Setter;
import java.io.Serializable;
import java.time.LocalDateTime;

/**
 * 分类
 */
@Data
public class Category implements Serializable {

    private static final long serialVersionUID = 1L;

    private Long id;


    //类型 1 菜品分类 2 套餐分类
    private Integer type;


    //分类名称
    private String name;


    //顺序
    private Integer sort;


    //创建时间
    @TableField(fill = FieldFill.INSERT)
    private LocalDateTime createTime;


    //更新时间
    @TableField(fill = FieldFill.INSERT_UPDATE)
    private LocalDateTime updateTime;


    //创建人
    @TableField(fill = FieldFill.INSERT)
    private Long createUser;


    //修改人
    @TableField(fill = FieldFill.INSERT_UPDATE)
    private Long updateUser;

}
- 数据层
package com.qiuluo.reggie.mapper;

import com.baomidou.mybatisplus.core.mapper.BaseMapper;
import com.qiuluo.reggie.domain.Category;
import org.apache.ibatis.annotations.Mapper;

@Mapper
public interface CategoryMapper extends BaseMapper<Category> {
}
- 业务层接口
package com.qiuluo.reggie.service;

import com.baomidou.mybatisplus.extension.service.IService;
import com.qiuluo.reggie.common.Result;
import com.qiuluo.reggie.domain.Category;

public interface CategoryService extends IService<Category> {
}
- 业务层实现类
package com.qiuluo.reggie.service.impl;

import com.baomidou.mybatisplus.core.conditions.query.LambdaQueryWrapper;
import com.baomidou.mybatisplus.extension.service.impl.ServiceImpl;
import com.qiuluo.reggie.common.CustomException;
import com.qiuluo.reggie.common.Result;
import com.qiuluo.reggie.domain.Category;
import com.qiuluo.reggie.domain.Dish;
import com.qiuluo.reggie.domain.Setmeal;
import com.qiuluo.reggie.mapper.CategoryMapper;
import com.qiuluo.reggie.service.CategoryService;
import org.springframework.beans.factory.annotation.Autowired;
import org.springframework.stereotype.Service;

@Service
public class CategoryServiceImpl extends ServiceImpl<CategoryMapper, Category> implements CategoryService {
}
- 服务层并书写方法
package com.qiuluo.reggie.controller;

import com.baomidou.mybatisplus.core.conditions.query.LambdaQueryWrapper;
import com.baomidou.mybatisplus.extension.plugins.pagination.Page;
import com.qiuluo.reggie.common.Result;
import com.qiuluo.reggie.domain.Category;
import com.qiuluo.reggie.service.impl.CategoryServiceImpl;
import lombok.extern.slf4j.Slf4j;
import org.springframework.beans.factory.annotation.Autowired;
import org.springframework.web.bind.annotation.*;

import javax.servlet.http.HttpServletRequest;

@Slf4j
@RestController
@RequestMapping("/category")
public class CategoryController {

    // 自动装配
    @Autowired
    private CategoryServiceImpl categoryService;

    // 查看前端url请求,为post类型,后面没有跟网页设置
    @PostMapping
    public Result<String> save(@RequestBody Category category){
        // 创建时间/人,修改时间/人均已统一设置,我们只需要将数据保存进数据库即可
        categoryService.save(category);
        return Result.success("新增成功");
    }

}
实际测试
来到主页面,新添后去数据库查看相关信息即可
分类信息分页查询
我们的功能开发一般分为三个阶段
需求分析
我们需要将数据展现到网页中,同时防止数据过多拥挤,我们采用分页查询的方法给出数据:

我们在之前的员工分类中已经完成了分页插件的创建,所以这次我们只需要刷新页面查看url以及数据即可:
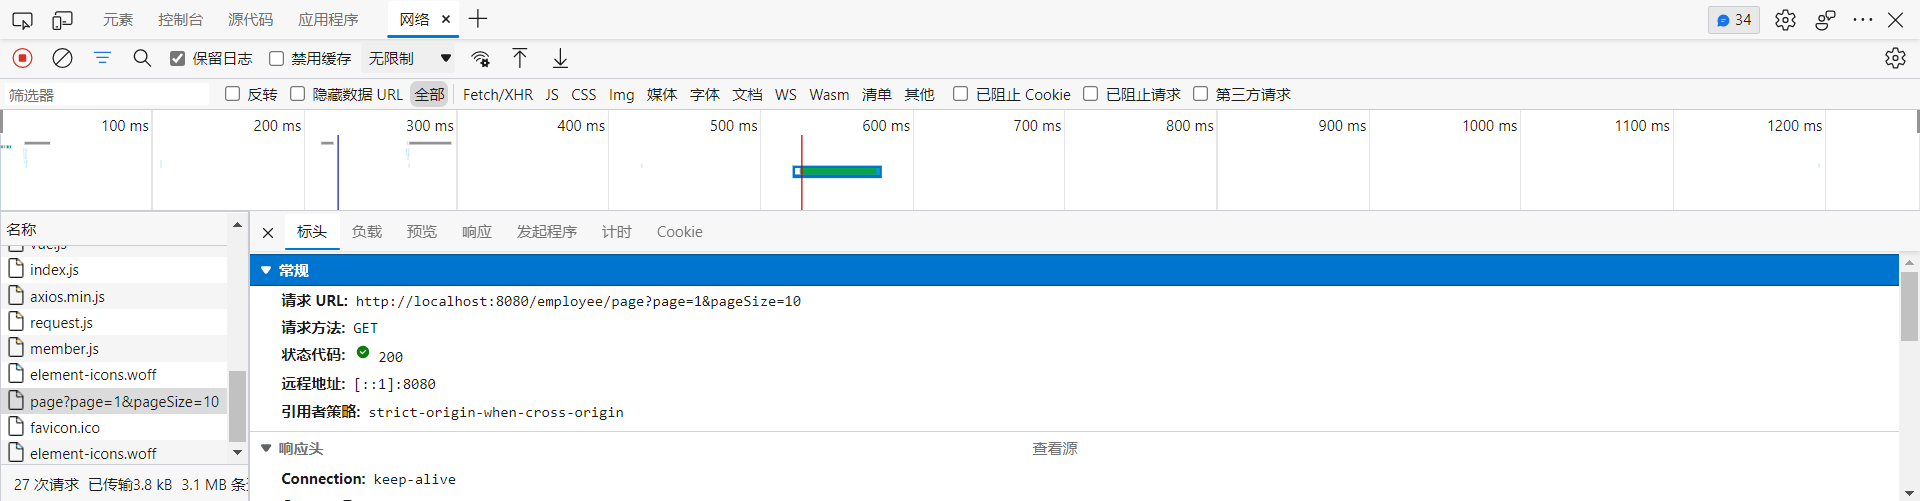
直接实现相关代码即可
代码实现
我们直接在CategoryController中实现方法即可:
package com.qiuluo.reggie.controller;

import com.baomidou.mybatisplus.core.conditions.query.LambdaQueryWrapper;
import com.baomidou.mybatisplus.extension.plugins.pagination.Page;
import com.qiuluo.reggie.common.Result;
import com.qiuluo.reggie.domain.Category;
import com.qiuluo.reggie.service.impl.CategoryServiceImpl;
import lombok.extern.slf4j.Slf4j;
import org.springframework.beans.factory.annotation.Autowired;
import org.springframework.web.bind.annotation.*;

import javax.servlet.http.HttpServletRequest;

@Slf4j
@RestController
@RequestMapping("/category")
public class CategoryController {

    @Autowired
    private CategoryServiceImpl categoryService;

    /**
    * 分页方法
    */

    @GetMapping("/page")
    public Result<Page> page(int page,int pageSize){

        // 创建Page,并载入参数
        Page pageImpl = new Page(page,pageSize);

        categoryService.page(pageImpl);

        // 我们不需要做匹配,但是我们需要按照sort的数值比对来进行排列,所以依旧需要创建LambdaQueryWrapper匹配器
        LambdaQueryWrapper<Category> queryWrapper = new LambdaQueryWrapper<>();
        queryWrapper.orderByAsc(Category::getSort);

        // 调用分页方法
        categoryService.page(pageImpl,queryWrapper);

        // 数据返回
        return Result.success(pageImpl);
    }

}
实际测试
我们直接打开页面,刷新页面,有数据出现即可
删除分类
我们的功能开发一般分为三个阶段
需求分析
我们点击页面后,可以查看后面有一个删除操作,点击后我们会删除该套餐:

但是请注意当当前套餐中有相关菜品时,我们如果删除,那么菜品将无法显示,所以我们还需要设置条件当该套餐中出现菜品时无法删除

我们的套餐中的菜品信息并非存储在套餐数据库中,而是存储在Dish和Setmeal数据表中:

所以我们需要创建这两者的基本信息,并在Category的业务层中修改默认代码,创建一个符合我们要求的方法
代码实现
首先我们将创建Dish和Setmeal的基本信息,下面不做配置,这里仅作简单罗列(和之前配置完全相同):
- Dish-Setmeal的实现类
- Dish-Setmeal的数据层
- Dish-Setmeal的业务层接口
- Dish-Setmeal的业务层
- Dish-Setmeal的服务层
接下来我们来介绍代码的正式实现:
- 首先去数据库业务层接口定义我们需要实现的方法接口:
package com.qiuluo.reggie.service;

import com.baomidou.mybatisplus.extension.service.IService;
import com.qiuluo.reggie.common.Result;
import com.qiuluo.reggie.domain.Category;

public interface CategoryService extends IService<Category> {

    // 书写我们需要的方法
    public Result<String> remove(Long id);
}
- 再去数据库业务层实现我们定义的方法:
package com.qiuluo.reggie.service.impl;

import com.baomidou.mybatisplus.core.conditions.query.LambdaQueryWrapper;
import com.baomidou.mybatisplus.extension.service.impl.ServiceImpl;
import com.qiuluo.reggie.common.CustomException;
import com.qiuluo.reggie.common.Result;
import com.qiuluo.reggie.domain.Category;
import com.qiuluo.reggie.domain.Dish;
import com.qiuluo.reggie.domain.Setmeal;
import com.qiuluo.reggie.mapper.CategoryMapper;
import com.qiuluo.reggie.service.CategoryService;
import org.springframework.beans.factory.annotation.Autowired;
import org.springframework.stereotype.Service;

@Service
public class CategoryServiceImpl extends ServiceImpl<CategoryMapper, Category> implements CategoryService {

    // 我们需要使用到DishServiceImpl,SetmealServiceImpl来查询是否有菜品相连,自动装配即可

    @Autowired
    private DishServiceImpl dishService;

    @Autowired
    private SetmealServiceImpl setmealService;

    // 实现方法
    public Result<String> remove(Long id){

        // 判断是否有菜品相连
        LambdaQueryWrapper<Dish> dishLambdaQueryWrapper = new LambdaQueryWrapper<>();
        dishLambdaQueryWrapper.eq(Dish::getCategoryId,id);

        int count1 = dishService.count(dishLambdaQueryWrapper);

        if (count1 > 0){
            // 如果有菜品相连,我们先抛出业务异常,这里暂时不实现,我们在后面实现
        }

        // 判断是否有套餐相连
        LambdaQueryWrapper<Setmeal> setmealLambdaQueryWrapper = new LambdaQueryWrapper<>();
        setmealLambdaQueryWrapper.eq(Setmeal::getCategoryId,id);

        int count2 = setmealService.count(setmealLambdaQueryWrapper);

        if (count2 > 0){
            // 如果有套餐相连,我们先抛出业务异常,这里暂时不实现,我们在后面实现
        }

        // 均无相连,采用父类的根据id删除方法,并返回成功信息
        super.removeById(id);

        return Result.success("成功删除");
    }

}
- 我们在前面抛出了业务异常,我们去定义一个自定义异常:
package com.qiuluo.reggie.common;

/**
 * 自定义业务异常类
 * 注意:自定义异常都需要继承RuntimeException
 */
public class CustomException extends RuntimeException{

    public CustomException(String message){
        super(message);
    }
}
- 去我们的总的异常处理器中添加处理该异常的方法:
package com.qiuluo.reggie.common;

import lombok.extern.slf4j.Slf4j;
import org.springframework.stereotype.Controller;
import org.springframework.web.bind.annotation.*;

import java.sql.SQLIntegrityConstraintViolationException;

/**
 * 全局异常处理
 * @ControllerAdvice 来书写需要修改异常的注解类(该类中包含以下注解)
 * @ResponseBody 因为返回数据为JSON数据,需要进行格式转换
 */
@ControllerAdvice(annotations = {RestController.class, Controller.class})
@ResponseBody
@Slf4j
public class GlobalExceptionHandler {

    /**
     * 处理异常
     * @ExceptionHandler 来书写需要修改的异常
     * @return
     */
    @ExceptionHandler(SQLIntegrityConstraintViolationException.class)
    public Result<String> exceptionHandler(SQLIntegrityConstraintViolationException ex){

        log.error(ex.getMessage());
        if (ex.getMessage().contains("Duplicate entry")){
            String[] split = ex.getMessage().split(" ");
            String msg = split[2] + "已存在";
            return Result.error(msg);
        }
        return Result.error("未知错误");
    }

    /**
     * 处理自定义异常
     * @ExceptionHandler 来书写需要修改的异常
     * @return
     */
    @ExceptionHandler(CustomException.class)
    public Result<String> CustomExceptionHandler(CustomException ex){

        // 我们直接获得异常中携带的信息并返回即可
        log.error(ex.getMessage());

        return Result.error(ex.getMessage());
    }
}
- 回到业务层相对应位置抛出异常
package com.qiuluo.reggie.service.impl;

import com.baomidou.mybatisplus.core.conditions.query.LambdaQueryWrapper;
import com.baomidou.mybatisplus.extension.service.impl.ServiceImpl;
import com.qiuluo.reggie.common.CustomException;
import com.qiuluo.reggie.common.Result;
import com.qiuluo.reggie.domain.Category;
import com.qiuluo.reggie.domain.Dish;
import com.qiuluo.reggie.domain.Setmeal;
import com.qiuluo.reggie.mapper.CategoryMapper;
import com.qiuluo.reggie.service.CategoryService;
import org.springframework.beans.factory.annotation.Autowired;
import org.springframework.stereotype.Service;

@Service
public class CategoryServiceImpl extends ServiceImpl<CategoryMapper, Category> implements CategoryService {

    @Autowired
    private DishServiceImpl dishService;

    @Autowired
    private SetmealServiceImpl setmealService;

    // 实现方法
    public Result<String> remove(Long id){

        // 判断是否有菜品相连
        LambdaQueryWrapper<Dish> dishLambdaQueryWrapper = new LambdaQueryWrapper<>();
        dishLambdaQueryWrapper.eq(Dish::getCategoryId,id);

        int count1 = dishService.count(dishLambdaQueryWrapper);

        if (count1 > 0){
            // 抛出业务异常
            throw new CustomException("已有菜品关联,无法删除!");
        }

        // 判断是否有套餐相连
        LambdaQueryWrapper<Setmeal> setmealLambdaQueryWrapper = new LambdaQueryWrapper<>();
        setmealLambdaQueryWrapper.eq(Setmeal::getCategoryId,id);

        int count2 = setmealService.count(setmealLambdaQueryWrapper);

        if (count2 > 0){
            // 抛出业务异常
            throw new CustomException("已有套餐关联,无法删除!");
        }

        super.removeById(id);

        return Result.success("成功删除");
    }

}
- 最后我们到服务层实现该接口
package com.qiuluo.reggie.controller;

import com.baomidou.mybatisplus.core.conditions.query.LambdaQueryWrapper;
import com.baomidou.mybatisplus.extension.plugins.pagination.Page;
import com.qiuluo.reggie.common.Result;
import com.qiuluo.reggie.domain.Category;
import com.qiuluo.reggie.service.impl.CategoryServiceImpl;
import lombok.extern.slf4j.Slf4j;
import org.springframework.beans.factory.annotation.Autowired;
import org.springframework.web.bind.annotation.*;

import javax.servlet.http.HttpServletRequest;

@Slf4j
@RestController
@RequestMapping("/category")
public class CategoryController {

    @Autowired
    private CategoryServiceImpl categoryService;

    // 这里需要注意:前端传来的id名称为ids(资料中带有的),参数搞错了是无法匹配的
    @DeleteMapping
    public Result<String> delete(Long ids){

        categoryService.remove(ids);

        return Result.success("删除成功");
    }
}
实际测试
回到主页面,点击一个自己创建的分类的删除键,分类消失
回到主页面,点击一个系统创建的分类的删除键,分类存在并弹出弹框显示已有关联无法删除
修改分类
我们的功能开发一般分为三个阶段
需求分析
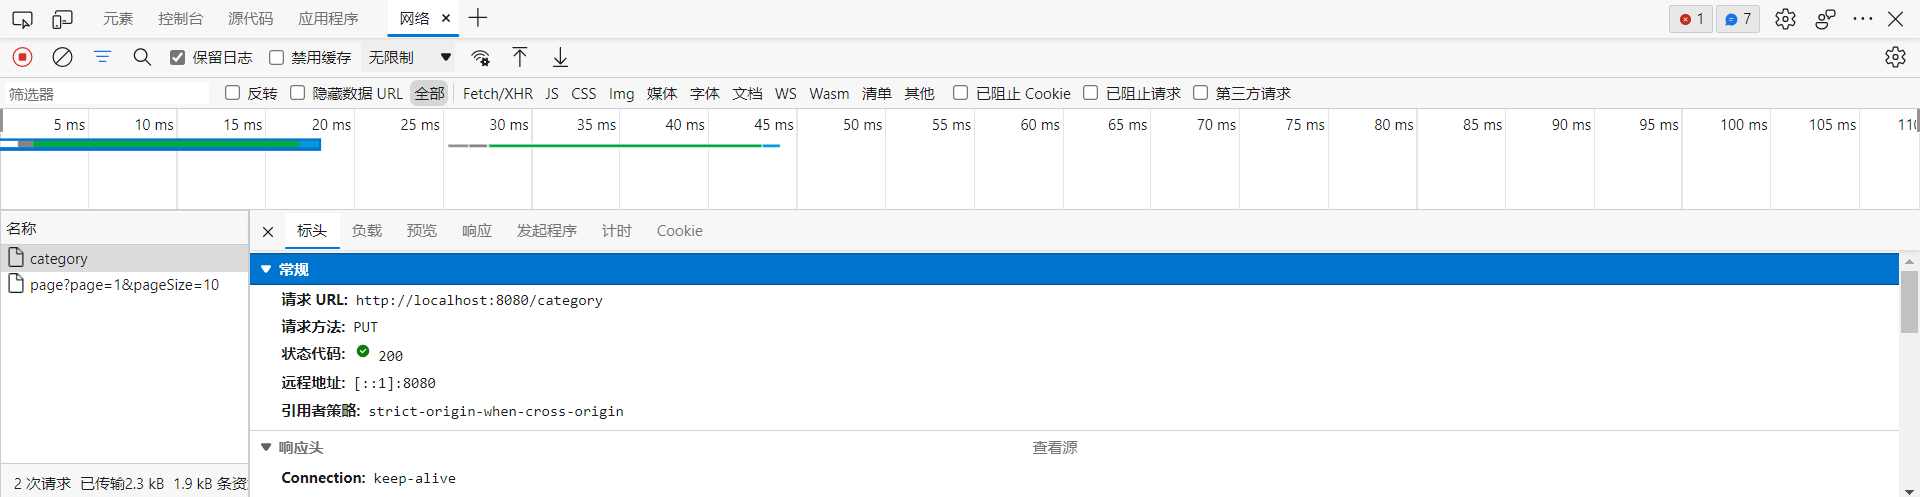
我们打开修改界面,点击修改后查看相关url以及参数即可
url如下:
参数如下:
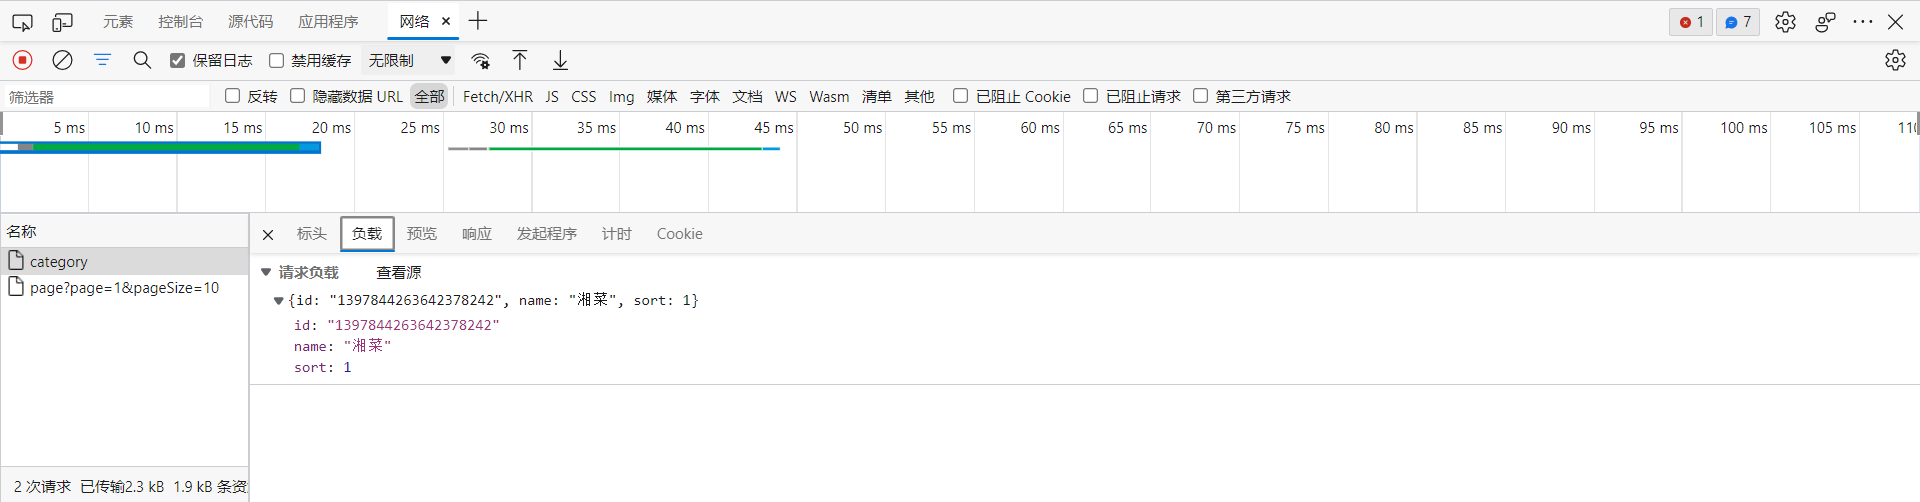
我们会发现修改分类实际是根据id来修改分类,其中传递的参数实际上是一个Category实现类
那么我们直接书写代码即可
代码实现
我们直接在服务层书写代码:
package com.qiuluo.reggie.controller;

import com.baomidou.mybatisplus.core.conditions.query.LambdaQueryWrapper;
import com.baomidou.mybatisplus.extension.plugins.pagination.Page;
import com.qiuluo.reggie.common.Result;
import com.qiuluo.reggie.domain.Category;
import com.qiuluo.reggie.service.impl.CategoryServiceImpl;
import lombok.extern.slf4j.Slf4j;
import org.springframework.beans.factory.annotation.Autowired;
import org.springframework.web.bind.annotation.*;

import javax.servlet.http.HttpServletRequest;

@Slf4j
@RestController
@RequestMapping("/category")
public class CategoryController {

    @Autowired
    private CategoryServiceImpl categoryService;

    @PutMapping
    public Result<String> update(@RequestBody Category category){

        categoryService.updateById(category);

        return Result.success("修改成功");
    }

}
实际测试
我们直接回到主页面,点击修改,来到后台查看数据实现即可
易错点
在这里我们会点出该项目目前容易出错的位置
工具类的使用
在公共字段自动填充的部分,我们为了使用ThreadLocal从而创建了相对的工具类
我们的工具类就是为了便捷操作而使用的,我们为了使用相关的参数但同时多次不用创建实体而直接使用工具类
例如我们的ThreadLocal的工具类中:
package com.qiuluo.reggie.common;

// 我们直接创建了实体threadLocal,那么我们调用该实体时就不用多次创建实体
// 同时我们给出了该实体的封装方法并设置为静态方法,那么我们就可以直接调用该工具类的静态方法来实现实体的方法

public class BaseContext {

    private static ThreadLocal<Long> threadLocal = new ThreadLocal<>();


    public static void setCurrentId(Long id){
        threadLocal.set(id);
    }


    public static Long getCurrentId(){
        return threadLocal.get();
    }
}
异常处理
我们平时遇到的异常都是产生错误由系统抛出的异常
只有真实的项目中我们才会需要创建自己定义的异常,难点在于异常的创建格式以及将异常加入异常处理器中
首先我们需要创建自定义异常:
package com.qiuluo.reggie.common;

/**
 * 自定义业务异常类
 * 注意:一定要继承RuntimeException
 * 继承RuntimeException之后我们才能直接抛出该异常
 */
public class CustomException extends RuntimeException{

    // 内部直接书写一个构造方法,因为我们抛出异常时都是直接new一个新的异常(手动书写)
    public CustomException(String message){
        // 存储一个简单的反馈信息
        super(message);
    }
}
再之后我们需要将该异常加入到异常处理器中:
package com.qiuluo.reggie.common;

import lombok.extern.slf4j.Slf4j;
import org.springframework.stereotype.Controller;
import org.springframework.web.bind.annotation.*;

import java.sql.SQLIntegrityConstraintViolationException;

/**
 * 全局异常处理
 * @ControllerAdvice 来书写需要修改异常的注解类(该类中包含以下注解)
 * @ResponseBody 因为返回数据为JSON数据,需要进行格式转换
 */
@ControllerAdvice(annotations = {RestController.class, Controller.class})
@ResponseBody
@Slf4j
public class GlobalExceptionHandler {

    /**
     * 处理自定义异常
     * @ExceptionHandler 来书写需要修改的异常
     * @return
     */
    @ExceptionHandler(CustomException.class)
    public Result<String> CustomExceptionHandler(CustomException ex){

        // 我们不需要做过多处理,我们只是将大部分需要抛出异常的部分整合起来在这里统一处理
        return Result.error(ex.getMessage());
    }
}
结束语
该篇内容到这里就结束了,希望能为你带来帮助~
附录
该文章属于学习内容,具体参考B站黑马程序员的Java项目实战《瑞吉外卖》
这里附上视频链接:业务开发Day3-01-本章内容介绍_哔哩哔哩_bilibili
原文地址:http://www.cnblogs.com/qiuluoyuweiliang/p/16812217.html